

Every seasoned crochet artist remembers the early days of aching fingers (challenges we demystify in our beginner crochet step-by-step guide), stiff wrists, and frustratingly uneven stitches that seemed either too tight to insert the hook or so loose the fabric lost all structure. If you are learning how to hold a crochet hook and control yarn tension, take heart: tension is not an innate genetic talent, but a physical habit developed through ergonomic posture and matching your grip to your unique hand anatomy. In this comprehensive guide, we break down the two primary ways to hold a hook—the Knife Grip and the Pencil Grip—along with proven finger threading techniques to unlock smooth, effortless rhythm.
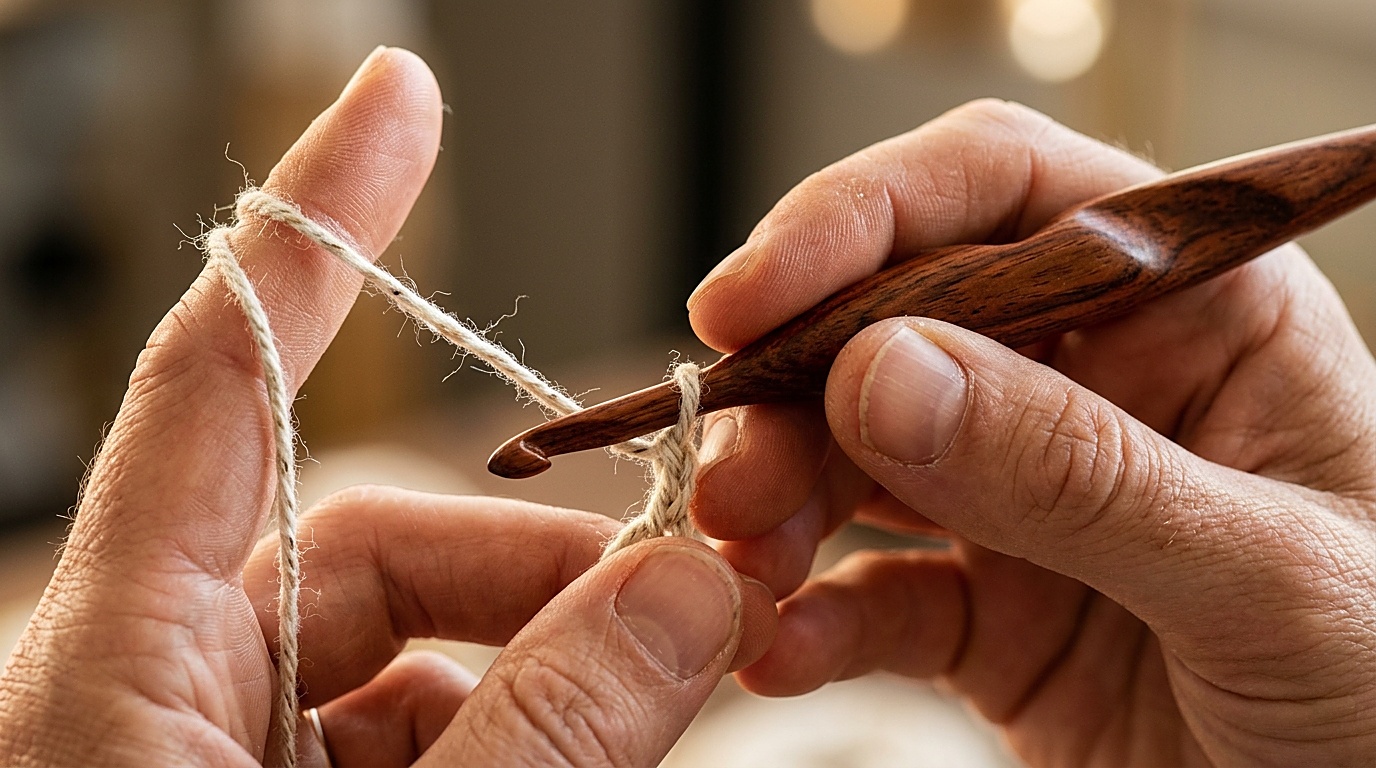
When you master hook ergonomics and tension, your speed increases, your stitches align with clean uniformity, and wrist fatigue completely vanishes. Pairing proper grip with the right hook size (see our yarn weight and hook size chart) ensures effortless gliding across every project. Finding your natural grip is the single most transformative foundation skill you will ever learn, whether you are crocheting delicate lace doilies or heavy chunky throws.
Knife Grip vs. Pencil Grip: Biomechanical Breakdown
Whether you are practicing fundamental stitches from our master crochet stitch directory or tackling your first projects from our best easy crochet projects for beginners, there is no universally “correct” way to hold a crochet hook—only the method that feels most natural, comfortable, and pain-free for your unique hands. Most makers gravitate toward one of two classic grips:
- The Knife Grip (Overhand Grip): You hold the hook handle overhand in the palm of your hand, exactly like holding a dinner knife to slice bread. Your index finger rests gently on top of the shaft to guide stitch placement, while your thumb and middle finger secure the thumb rest. This grip engages the forearm and shoulder rather than small finger joints, making it the preferred choice when working with heavy chunky yarns, bulky hooks (6.0mm and above), or for makers dealing with arthritis.
- The Pencil Grip (Underhand Grip): You hold the hook underhand between your thumb and index finger, resting the shaft in the crook between thumb and index finger, exactly like holding a pen or pencil. This grip relies on fine micro-movements of the fingers and wrist. It provides exquisite control when working with delicate lace threads, micro-crochet jewelry, and small steel hooks.

3 Guide-Hand Threading Methods for Perfect Tension
While your dominant hand holds the hook, your non-dominant hand (the guide hand) does the real work of regulating tension. The guide hand must hold the working yarn taut enough to catch with the hook, yet loose enough to glide smoothly through your fingers without pinching. Try these three classic threading methods:
- Method A: The Pinky Wrap (Maximum Control): Wrap the working yarn one full loop around your little finger, bring it under your ring and middle fingers, and drape it over your index finger. The pinky acts as an adjustable brake: squeezing your pinky slightly halts yarn flow, while relaxing it lets yarn glide. Outstanding for slick, slippery fibers like bamboo, rayon, and mercerized cotton.
- Method B: The Over-the-Index Weave (Balanced Flow): Weave the yarn over your pinky, under your ring finger, over your middle finger, and over your index finger. This creates three gentle friction contact points that maintain steady, moderate tension without squeezing your fingers. Ideal for standard worsted wools and everyday acrylics.
- Method C: The Ring-Finger Clamp (Loose & Drapey): Let the yarn pass straight under your pinky and clamp gently between your ring finger and palm, draped over your index finger. Excellent for makers who naturally crochet too tightly and need to loosen their gauge for fluid cardigans and shawls.

Hook Design & Ergonomics: Inline vs. Tapered
The physical anatomy of your crochet hook has a massive impact on hand strain. Hooks generally fall into two throat geometries:
- Inline Hooks (e.g., Susan Bates): The hook head is perfectly in line with the shaft, and the throat has a sharp, deep angle. This catches yarn securely and is wonderful for beginners who struggle with yarn slipping off the hook. However, the sharper groove can sometimes split loosely plied yarn.
- Tapered Hooks (e.g., Boye, Clover Amour): The head is rounded and slightly narrower than the shaft, with a smooth, sloping throat. Tapered hooks slip effortlessly into tight stitches without splitting plies, making them the favorite for speed crocheters.
- Ergonomic Contoured Handles: Thin aluminum hooks force your fingers into a tight pinch grip. Ergonomic hooks with wide silicone or contoured wooden handles distribute pressure across your whole palm, eliminating cramping during long crafting sessions.
Diagnostic Troubleshooting: Fixing Common Tension Symptoms
If your finished fabric doesn’t look quite right, use this symptom guide to diagnose and calibrate your tension:
- Symptom: Stitches are impossibly tight and your hook squeaks against the yarn:
Diagnosis: You are working exclusively on the tapered tip of the hook rather than sliding the loop all the way onto the uniform cylindrical shank. You are also likely death-gripping the working yarn with your guide hand.
Fix: After pulling up a loop, slide it back onto the full width of the hook shank before completing your yarn-over. Switch to Method C (loose threading). - Symptom: Gaping holes between stitches and limp, floppy fabric:
Diagnosis: Your index finger is too close to your work or dropping slack between yarn-overs.
Fix: Lift your index finger slightly higher (about 1.5 inches above your work) to keep the yarn bridge taut. Switch to Method A (pinky wrap) to increase friction. - Symptom: Rows get narrower or wider as you crochet:
Diagnosis: You are either accidentally dropping edge stitches or your emotional state is changing your tension (many makers crochet tighter when stressed and looser when relaxed).
Fix: Count your stitches at the end of every row and place locking stitch markers on the first and last stitch of each row.

Hand Health & Preventing Repetitive Strain Injury (RSI)
Crochet should bring calm, not physical pain. Protect your hands and wrists for decades of comfortable making with these ergonomic habits:
- The 20-Minute Micro-Break: Every twenty minutes, place your hook on the table, drop your arms to your sides, and gently shake out your hands. Roll your shoulders backward five times to release upper back tension.
- The Forearm Stretch: Extend your right arm straight in front of you with your palm facing forward (like signaling “stop”). Use your left hand to gently draw your fingers backward toward your body for 15 seconds. Repeat with your palm facing inward.
- Support Your Elbows: Never crochet with your forearms hovering in mid-air. Rest your elbows on a firm pillow or the armrests of your chair to take the load off your neck and shoulders.
Save This Guide to Pinterest for Your Crochet Library
Pin this hook grip and tension reference guide to your Pinterest crochet tips board so you can easily reference these hand positions and tension fixes whenever you start a new project!

