

The crochet waffle stitch is a classic textured stitch pattern (featured prominently in our master crochet stitch directory) known for its dimensional, square-grid relief that resembles the surface of a breakfast waffle. Created by pairing standard double crochet stitches with front post double crochets (FPDC), this technique produces a thick, cushiony fabric with deep visual depth and thermal warmth. In this guide, you will learn the exact mechanics of the front post stitch, a consistent two-row repeat, how to visually read your grid to prevent drifting, and a simple mathematical formula to scale the stitch to any custom width.
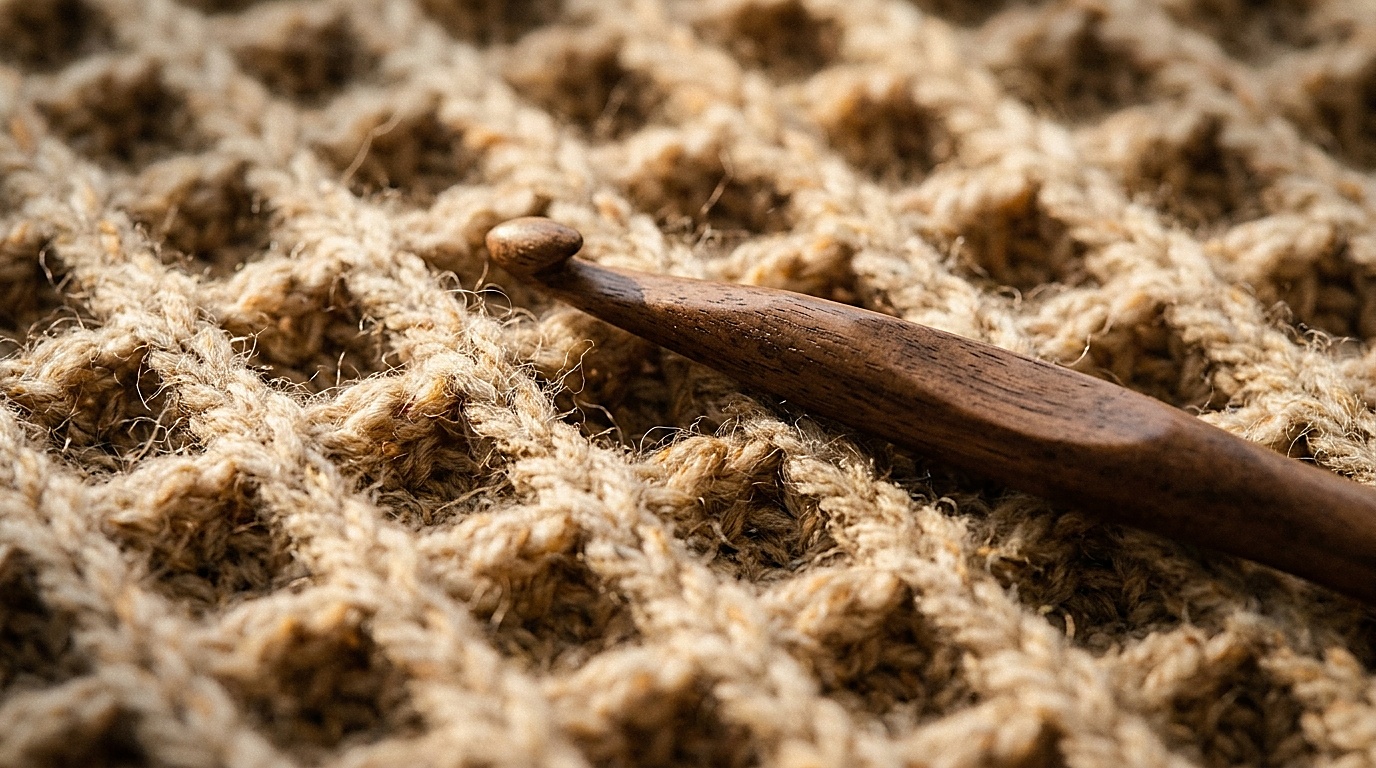
Waffle Stitch at a Glance
Before casting on, review the technical parameters of the stitch (for projects requiring a softer, flat drape, compare this with our crochet moss stitch tutorial):
| Skill Level | Confident Beginner |
| Terminology | US Crochet Terms |
| Stitches Used | Chain (ch), Double Crochet (dc), Front Post Double Crochet (FPDC, a technique also highlighted in our alpine stitch tutorial) |
| Active Stitch Multiple | Multiple of 3 |
| Foundation Chain Rule | multiple of 3 + 2 foundation rule (the 2 extra chains provide turning height) |
| Row Repeat | 2-Row Repeat (Row 2 and Row 3) |
| Turning Chain Rule | Chain 2 at start of each row; the turning chain does NOT count as a stitch |
| First Stitch Placement | Work into the very first stitch (at the base of the turning chain) |
| Last Stitch Placement | Work into the final regular double crochet (do not work into the turning chain) |
| Fabric Reversibility | Reversible: 3D recessed pockets on Right Side; raised windowpane grid on Wrong Side |
Mastering the Front Post Double Crochet (FPDC)
The Front Post Double Crochet (abbreviated FPDC) is the foundational movement that elevates this stitch from flat fabric into a structural 3D grid. Unlike standard crochet where your hook enters the horizontal “V” loops along the top edge, a post stitch is worked around the vertical stem (the post) of the stitch in the row below.

Step-by-Step Movement:
- Yarn Over: Wrap the working yarn over your hook from back to front, exactly as you would for a normal double crochet.
- Insert Around the Post: Insert your hook from the front of the fabric toward the back into the space to the right of the stitch post, then bring the tip of the hook back out to the front on the left side of the post. The post now rests horizontally across the shaft of your hook.
- Draw Up a Loop: Yarn over and pull a loop through and around the post. Critical tension check: Draw this loop up until it matches the working height of the current row. If you pull too tightly, the post will compress downward and cause your fabric to curl.
- Complete the Stitch: Yarn over and pull through the first 2 loops on your hook (2 loops remain). Yarn over again and pull through the remaining 2 loops.
Working around the post pulls the body of the stitch forward toward you, creating the raised vertical ribs that border each waffle square.
Step-by-Step Practice Swatch
To master the rhythm and verify your tension, work this 18-stitch practice swatch. This swatch provides exactly 5 complete waffle squares with symmetrical outer ribs and clean edge borders.

Foundation Chain: Chain 20.
(Calculation: 18 active stitches + 2 turning chains = 20 chains total).
Expected Active Stitches: 18 stitches across all rows.
Row 1 (Foundation Base):
Work 1 dc into the 3rd chain from the hook (the 2 skipped chains provide turning height and do not count as a stitch). Work 1 dc into each remaining chain across to the end of the foundation. Turn work.
Expected count: Exactly 18 dc.
Row 2 (Right Side — Ridge Formation):
Chain 2 (does not count as a stitch here or throughout).
Work 1 dc into the very first stitch at the base of the chain 2 (this forms the straight left border).
*Work 1 FPDC around the post of the next stitch, then work 1 dc into the top of each of the next 2 stitches.*
Repeat from * to * across the row until exactly 2 stitches remain.
Work 1 FPDC around the post of the second-to-last stitch (closing the final waffle square), then work 1 dc into the top of the final stitch (right border).
Do not work into the turning chain from Row 1. Turn work.
Expected count: Exactly 18 stitches (2 border dc, 6 raised FPDC ribs, 5 recessed 2-dc pockets).
Row 3 (Wrong Side — Valley Formation):
Chain 2 (does not count as a stitch).
Work 1 dc into the very first stitch at the base of the chain 2.
*Work 1 dc into the top of the next stitch, then work 1 FPDC around the post of each of the next 2 stitches.*
Repeat from * to * across the row until exactly 2 stitches remain.
Work 1 dc into the top of the second-to-last stitch, then work 1 dc into the top of the final stitch.
Do not work into the turning chain below. Turn work.
Expected count: Exactly 18 stitches.
Pattern Repeat:
Repeat Row 2 and Row 3 in sequence until your swatch or project reaches your desired length. Always end your project on a Row 2 repeat so that your top finishing edge mirrors the bottom border with clean, raised square pockets.
How to Read the Waffle Grid
Rather than stopping to count stitches on every row, learning to “read” your fabric allows you to verify accuracy at a glance:
- Row 2 (Right Side) Alignment: When looking at the Right Side, every FPDC must sit directly on top of the FPDC rib from two rows below. If a raised post appears over one of the flat recessed stitches, a stitch was missed or added earlier in the row.
- Row 3 (Wrong Side) Alignment: On the Wrong Side, the logic reverses. The two FPDC stitches are worked around the two posts that formed the recessed pocket on the front. This pushes the bottom of the pocket forward and creates the horizontal bar of the waffle grid. The single dc is worked into the top of the single rib.
- Symmetry Check: A correctly worked piece will always have equal borders: one straight standard dc on the far left edge, and one straight standard dc on the far right edge.
Troubleshooting Common Stitch Problems
If your swatch is not forming neat, square pockets, check these common mechanical issues:
Symptom: The waffle columns are shifting diagonally.
Likely Cause: An FPDC was accidentally worked around a flat stitch instead of the vertical rib, or an extra stitch was added at the start of the row.
The Fix: Check your first repeat on Row 2. The first FPDC must wrap around the existing vertical rib from Row 2 below. Ensure you did not place two standard double crochets before the first post stitch.
Symptom: The project is getting narrower over several rows.
Likely Cause: The final stitch of the row is being skipped.
The Fix: Because the turning chain-2 does not count as a stitch, the final dc must be placed into the top of the last true double crochet of the row below. Count your active stitches; if you started with 18 and now have 17, locate where the edge stitch was omitted.
Symptom: The project is getting wider.
Likely Cause: Treating the turning chain as a stitch and placing an extra stitch into the turning chain space at the end of the row.
The Fix: The ch-2 serves strictly as vertical turning height. Never work a stitch into the turning chain loops or the space beneath it. Place your first dc into the first stitch, and your last dc into the last dc.
Symptom: The bottom corners or side edges are curling inward.
Likely Cause: FPDC loops are being pulled too tight, or the initial foundation chain lacked sufficient slack.
The Fix: When pulling up the loop for each FPDC, lift your hook upward slightly so the loop reaches the level of the working row before yarning over. If your foundation edge curls, restart using a hook 0.5 mm to 1.0 mm larger for the chain row only, or use foundation double crochet (FDC).
Symptom: The fabric feels stiff and board-like rather than soft.
Likely Cause: The hook size is too small for the selected yarn weight. Post stitches draw fabric tightly together and increase density.
The Fix: Increase your hook size by 0.5 mm to 1.0 mm above the label recommendation to give the post stitches room to drape.
Choosing Yarn for Waffle Stitch
Because the waffle stitch relies on shadow and physical relief to showcase its pattern, yarn choice significantly impacts the final result:
- Smooth, Plied Yarns: Tightly spun acrylic, smooth merino wool, and mercerized cotton produce crisp, sharp grid lines with maximum shadow definition.
- Fuzzy or Bouclé Yarns: Heavily textured, brushed, or mohair-blend yarns obscure the structural ridges, making it difficult to see the waffle squares and locate post stitches.
- Cotton & Linen Blends: Produce firm, structured textiles with minimal stretch. Well-suited for washcloths, placemats, and hot pads where dimensional texture aids scrubbing.
- Wool, Acrylic & Blends: Offer natural elasticity and loft, allowing the recessed pockets to trap air effectively for warm, drapey winter scarves, cowls, and blankets.
- Yarn Usage Note: Because post stitches travel around the body of the stitch rather than simply anchoring into the top loops, waffle stitch requires more yarn than a flat double crochet piece of identical dimensions. To avoid running short on large projects, measure the yardage used in your practice swatch to calculate project needs accurately.
How to Adjust Width for Any Project
To adapt this stitch to a custom project width (such as a scarf, baby blanket, or dishcloth), use this verified formula:
$$\text{Active Stitches} = \text{Any Multiple of 3}$$
$$\text{Foundation Chain} = \text{Active Stitches} + 2$$
Worked Example:
Suppose you want to crochet a scarf that is approximately 8 inches wide, and your swatch gauge shows that 3 stitches equal 1 inch:
- Determine required active stitches: 8 inches × 3 stitches/inch = 24 active stitches (which is a valid multiple of 3: $3 \times 8 = 24$).
- Calculate foundation chain: 24 active stitches + 2 turning chains = 26 chains.
- Work Row 1 into the 3rd chain from the hook to establish 24 double crochets.
- Rows 2 and 3 will yield 1 left border dc, 7 waffle repeats (7 recessed squares, 8 raised ribs), and 1 right border dc, totaling exactly 24 stitches.
Practical Project Applications

- Kitchen & Bath Textiles: The raised ridges provide scrubbing grip and thickness, making waffle stitch a staple for cotton washcloths, hand towels, and pot holders.
- Cold-Weather Accessories: The double-thick structure provides thermal insulation for scarves, earwarmers, and cowls worked in wool or acrylic blends.
- Home Decor: Reversible texture makes this pattern popular for throw pillows, seat pads, and afghans where both sides of the fabric are visible.
Save This Stitch Guide for Later
Save these reference cards to your Crochet Stitches & Tutorials board on Pinterest so you have the stitch multiple and repeat instructions ready when planning your next textured project.


Frequently Asked Questions
Is the waffle stitch reversible?
Yes. While the Right Side features deep rectangular waffle indentations, the Wrong Side displays a raised grid pattern resembling windowpane check. Both sides are neat and structurally finished.
Can I start the waffle stitch with Foundation Double Crochet (FDC)?
Yes. If you dislike working into a foundation chain or struggle with chain curling, work a multiple of 3 Foundation Double Crochet stitches (such as 18 FDC). Then chain 2, turn, and begin directly with Row 2.
Why does the turning chain not count as a stitch in this pattern?
Counting turning chains as stitches often causes beginners to accidentally drop or add edge stitches. Treating the chain-2 purely as vertical turning height allows you to work into every true stitch from the first to the last, keeping your margins straight without edge gaps.