

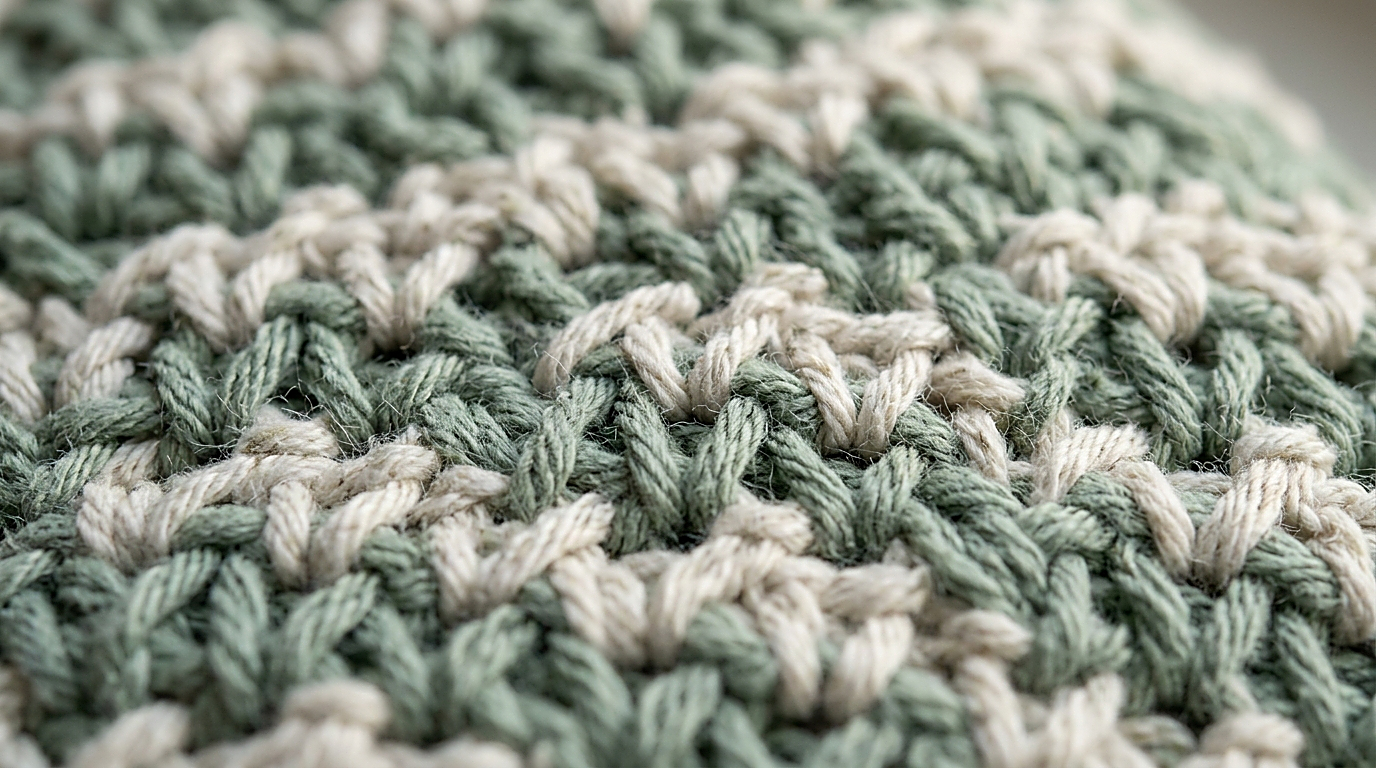
Few crochet textures strike the delicate balance between structural drape, meditative rhythm, and modern minimalism quite like the Moss Stitch. Also known across pattern libraries as the Linen Stitch or Granite Stitch, this classic technique alternates simple single crochet stitches with chain-1 spaces to produce a flat, supple fabric reminiscent of fine woven cloth. Because stitches sit offset in brickwork fashion rather than stacking directly on top of each other, the resulting textile is visually reversible, consumes less yarn than solid single crochet, and avoids the stiff rigidity often associated with dense crochet stitches.
Despite its beginner-friendly reputation, makers frequently encounter two common hurdles: an arched, curling foundation edge and side margins that inadvertently taper inward. This guide breaks down the underlying stitch geometry, provides clear US abbreviations, demonstrates the physical mechanics of working into chain spaces, and establishes a reliable framework for keeping edges straight across every row (master foundational stitches in our master crochet stitch directory).
US Terminology & Stitch Abbreviations
This tutorial is written in standard US Crochet Terminology. Review these foundational abbreviations before picking up your hook:
- ch (chain): Yarn over and draw a new loop through the active loop on your hook.
- sc (single crochet): Insert hook into the designated space, yarn over, pull up a loop (2 loops on hook), yarn over, and draw through both loops.
- sk (skip): Bypass the indicated stitch or chain without working into it.
- ch-sp (chain space): The open gap created beneath a chain stitch from the preceding row (your hook glides under the entire strand rather than into stitch loops).
- yo (yarn over): Wrap the working strand over your crochet hook from back to front.
Materials & Illustrative Gauge

- Yarn: Medium Worsted Weight (CYC Category #4) yarn with smooth plies and minimal surface fuzz to keep chain spaces clearly defined (explore fiber comparisons in our crochet yarn weight and hook size guide).
- Crochet Hooks: Two hooks are used to eliminate tight bottom hems:
- 5.5 mm (US I-9): Used exclusively to work the initial foundation chain.
- 5.0 mm (US H-8): Used for Row 1 through the remainder of the project.
- Notions: 2 locking stitch markers (vital for anchoring edge turning spaces) and a blunt tapestry needle for weaving yarn tails.
- Illustrative Gauge (Estimate): Approximately 9 pattern repeats (occupying 18 individual stitch positions: 9 sc + 9 ch-1 spaces) and 16 rows = 4 inches (10 cm) unblocked with a 5.0 mm hook. Crucial Note: This gauge measurement reflects the repeating body fabric and excludes the outer turning edge equivalents. Gauge and dimensions are illustrative estimates; personal hand tension, yarn elasticity, and hook material will cause natural variations.
Foundation Chain & Row 1 Instructions
The moss stitch requires an even foundation chain. For our reference practice swatch, we chain 20. Working your initial chain with a hook 0.5 mm larger than your body hook provides the necessary elasticity so your bottom edge lays relaxed without pulling tight like a bowstring.
Step 1 (Foundation Chain): Using the larger 5.5 mm hook, create a slipknot and chain 20 with relaxed, even tension. Set the 5.5 mm hook aside and switch to your 5.0 mm project hook.
Step 2 (Row 1 Setup): Insert your hook into the 4th chain from the hook. The 3 skipped chains provide 2 chains for the turning edge allowance (the edge stitch equivalent) plus 1 skipped chain that forms the foundation for the first chain-1 space. Work 1 single crochet into this 4th chain. *Chain 1, skip 1 foundation chain, work 1 single crochet in the next chain.* Repeat from * to * across the foundation. Your final single crochet will land squarely in the 20th (last) chain.
Verified Row 1 Count: You have completed exactly 9 physical single crochets, separated by 8 intervening chain-1 spaces, alongside 1 initial edge chain space formed by the skipped chains. Together, this establishes exactly 9 body pattern repeats (spanning 18 individual stitch positions: 9 sc + 9 spaces), with the first 2 skipped chains serving separately as the turning edge equivalent.

Row 2: Hook Placement into the Chain Space
Row 2 establishes the continuous rhythm of the moss stitch. In this tutorial, we use the classic Chain-2 turning method. (Note: other valid variations utilize a Chain-1 turn with an immediate stitch; both are acceptable, but maintaining one consistent method throughout your project is essential for straight edges).
Step 1 (The Turn): Turn your work, then Chain 2. These 2 chains serve as the turning edge equivalent and establish the initial chain space for Row 2.
Step 2 (First Single Crochet): Skip the very first single crochet post at the edge. Insert your hook directly into the first chain-1 space from Row 1. Do not insert into the top loops (“V”) of any stitch—glide the hook beneath the chain strand into the open gap.

Step 3 (Working the Repeat): Yarn over and pull up a loop, yarn over and pull through both loops to complete the single crochet. *Chain 1, skip the next single crochet post, work 1 single crochet into the next chain-1 space.* Repeat from * to * across the row.
Step 4 (The Crucial Final Stitch): When you reach the end of Row 2, work your 9th (final) single crochet directly into the space formed by the skipped chains from the beginning of Row 1. Count your stitches: you have 9 single crochets and 9 chain spaces (including the starting ch-2 turn), maintaining an identical count of 9 body pattern repeats (18 individual stitch positions).
Row 3, The Repeat & Straight Edge Alignment
Row 3: Turn your work, chain 2. Skip the first single crochet post. Work 1 single crochet into the first chain-1 space. *Chain 1, skip next sc, work 1 single crochet into the next chain-1 space.* Repeat across. The final single crochet is worked into the turning chain-2 space from the end of Row 2 (the gap between the last sc post and the turning chain).
Row 4 and Beyond: Simply repeat Row 3 for the duration of your project. Every single row consistently contains 9 single crochets and 9 chain spaces, maintaining 9 body pattern repeats.

Three Practices for Straight, Uniform Edges
- 1. Anchor the Turning Chain with a Marker: As soon as you chain 2 and turn, slip a small locking stitch marker directly onto the turning strand. When working back on the subsequent row, that marker highlights exactly where your hook must enter for your final stitch.
- 2. Calibrate Turning Chain Tension: If your side margins appear wavy or loose, your turning chains are too slack. Keep the first chain snug against the edge post, or experiment with a slightly tighter hand (learn tension adjustments in our guide to hook grips and yarn tension).
- 3. Logical Width Confirmation: Tracing the mathematics across Rows 1, 2, and 3 confirms that each row begins with 1 edge equivalent, contains 8 body repeats, and terminates with 1 single crochet in the outer space. The stitch count cannot shrink unless the final edge space is accidentally skipped.
Two-Row Color Striping & Clean Transitions
Because each single crochet sits nestled between stitches of the row below, working alternating two-row stripes in contrasting shades (such as muted sage and soft heather cream) creates an intricate, tweed-like texture. Best of all, you do not need to fasten off yarn or weave in dozens of loose ends.
Changing Colors Cleanly: On the very last single crochet of Row 2 in Color A, execute the color change across two distinct steps:
- Step 1 (Two Working Loops on Hook): Insert your hook into the turning chain space, yarn over with Color A, and draw up a loop. Pause when exactly 2 loops of Color A remain on your hook shank. Drop Color A to the back.
- Step 2 (Complete Stitch with New Color): Loop the incoming strand of Color B over your hook (yarn over) and draw it cleanly through both Color A loops on the hook. This completes the single crochet and leaves 1 active loop of Color B ready to work your turning chain-2.

Carrying Up the Side: Complete two full rows in Color B. When executing the final pull-through of the second row, drop Color B and pick Color A back up along the side edge. Draw Color A up with moderate tension—avoid pulling tightly, which puckers the margin, and avoid leaving slack loops. When your project is finished, a simple perimeter border of single crochet completely encloses the carried strands.

Project Sizing & Estimated Yardage Calculations
To calculate custom starting chains from your own practice swatch, follow this unified mathematical framework:
Core Definitions & Separations:
- 1 Body Pattern Repeat: Consists of 1 single crochet + 1 chain-1 space. Each repeat occupies 2 individual stitch positions in the fabric and requires 2 foundation chains.
- Individual Stitch Positions: Every physical single crochet post and every chain-1 space counts as 1 position (e.g., 9 repeats = 18 stitch positions wide).
- Turning Edge Equivalents: The turning chains provide edge height and turning space. The foundation edge allowance requires 2 additional chains accounted for separately.
Derived Starting Chain Formula:
- 1. Measure how many body repeats (1 sc + 1 ch-sp pairs) you achieve across 4 inches on your unblocked swatch (excluding edge turns), then divide by 4 to determine repeats per inch (our illustrative estimate: 9 repeats / 4 inches = 2.25 repeats per inch).
- 2. Multiply your target project width (in inches) by your repeats per inch to determine target body repeats:
Target Repeats (N) = Target Width × 2.25. Round to the nearest whole integer. - 3. Calculate the starting chain using the derived formula:
Starting Chain = (2 × N) + 2. - 4. Because (2 × N) is always an even number, adding 2 for the edge allowance mathematically guarantees an even starting chain.
The table below illustrates starting chains and yardage estimates based on our illustrative gauge of 2.25 body repeats per inch (9 body repeats = 18 individual stitch positions per 4 inches, excluding edge equivalents) with worsted yarn:
⇄ Swipe left or right to see all columns.
| Project Type | Target Dimensions (Estimates) | Target Body Repeats (N) | Starting Chain (Formula: 2N + 2) | Estimated Yardage |
|---|---|---|---|---|
| Kitchen Washcloth (try our easy crochet dishcloth pattern) | 8″ × 8″ (20 × 20 cm) | 18 repeats | Chain 38 | approx. 75 – 90 yards (cotton) |
| Winter Drape Scarf | 8″ × 70″ (20 × 178 cm) | 18 repeats | Chain 38 | approx. 450 – 520 yards |
| Baby Nursery Blanket | 30″ × 36″ (76 × 91 cm) | 68 repeats | Chain 138 | approx. 950 – 1,100 yards |
| Classic Lapghan Throw | 40″ × 52″ (102 × 132 cm) | 90 repeats | Chain 182 | approx. 1,650 – 1,900 yards |
| Cozy Living Room Afghan | 50″ × 60″ (127 × 152 cm) | 113 repeats | Chain 228 | approx. 2,400 – 2,750 yards |
*Note: All gauge, dimension, and yardage figures are unmeasured illustrative estimates. Stitch tension, fiber composition, and perimeter edging will alter physical outcomes.*
Fiber Care, Laundering & Blocking Guidelines
Care requirements depend entirely on your chosen fiber composition. Always check your specific yarn ball band before blocking or washing:
- Cotton & Linen Blends: Benefit from a gentle wash in cool water. Reshape while damp and lay flat on blocking mats to dry square. Cotton can tolerate warm iron steam to crisp up margins.
- Wool & Animal Fibers: Respond beautifully to wet blocking. Submerge in lukewarm water with no-rinse wool wash, press excess water out in a dry towel (never wring), pin to target measurements, and allow to air dry (step-by-step tutorial in how to block crochet and finish edges).
- Acrylic Fibers: Best blocked with gentle hovering steam from an iron held 2 inches away. Never touch a heated iron soleplate to acrylic fabric, as synthetic fibers will melt.
Troubleshooting Common Questions
Why is my starting edge arching or curling upward?
Foundation chains inherently have less elasticity than woven moss stitch fabric. If your starting chain was worked too tightly, the fabric will curve into a smile. Working your starting chain with a hook 0.5 mm to 1.0 mm larger and switching back to your standard hook for Row 1 reliably resolves this tension imbalance.
Why does my rectangular project narrow as it grows?
You are dropping the final single crochet of the row. Remember that the last stitch must be worked into the space created by the turning chain from the row below. Placing a small locking marker into that turning strand right after making your turn will keep the target visible without obstructing the opening.
Why do my side edges look loose and wavy?
Your turning chains may be worked too loosely. Focus on keeping the first chain of the Chain-2 turn snug against the edge post, or experiment with the alternative Chain-1 turning method on a practice swatch to see which matches your personal hand tension best.
Save This Moss Stitch Tutorial to Pinterest
Pin these high-resolution reference guides to your favorite Pinterest crochet boards so you always have the stitch multiple, straight edge rules, and sizing chart ready when starting your next project!

