

A well-crafted throw pillow has the remarkable power to anchor an entire living room, adding tactile depth, architectural shadow, and artisanal warmth to sofas and armchairs. While flat fabric cushions often recede into the background, this Textured Bobble Crochet Pillow introduces a rhythmic grid of dimensional popcorn spheres that command attention. Worked in an earthy mustard gold paired with an understated winter white companion, this 20-inch square heirloom accent combines rich mid-century geometric texture with modern Nordic simplicity.
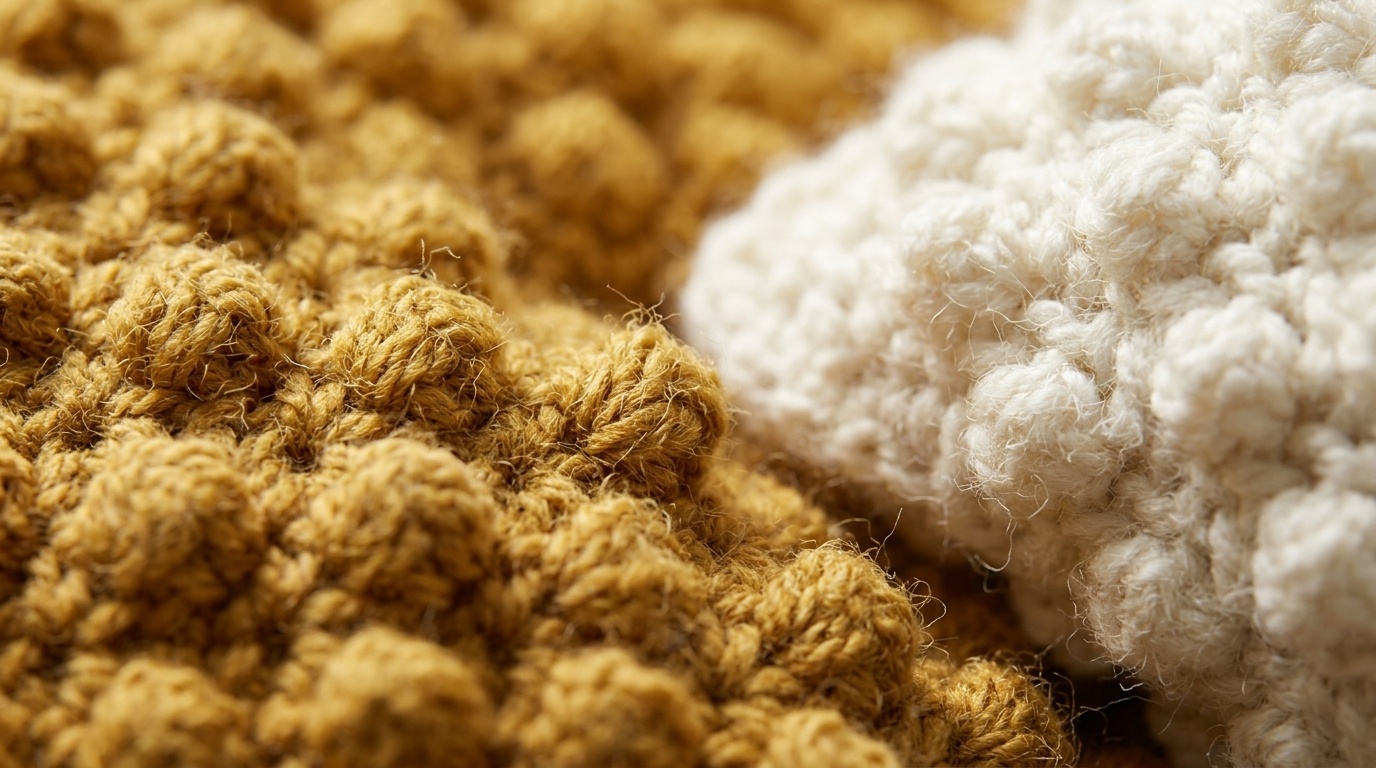
Behind the striking three-dimensional relief of this cushion lies an ingenious stitch cadence: a predictable four-row repeat that alternates solid double-crochet resting rows with staggered bobble clusters. By anchoring each five-stitch cluster between compact single crochets, the raised globes pop emphatically forward onto the right side of the fabric without collapsing inward. Finished with a tailored reverse single crochet (crab stitch) perimeter, this structural case encases standard 20-inch pillow forms with clean, square corners that never sag.
Why You’ll Love Crocheting This Textured Bobble Cushion
- High-Impact Architectural Texture: The staggered bobble sequence creates geometric diagonals that catch natural room lighting dynamically throughout the day.
- Rhythmic & Relaxing 4-Row Cadence: Once you establish the offset between odd and even bobble rows, the pattern becomes deeply intuitive, making it a meditative evening project.
- Tailored Reverse Single Crochet Edging: Eliminates flimsy exterior seams by joining front and back panels directly with a corded, rope-like crab stitch border.
- Standard 20-Inch Square Sizing: Engineered to fit ubiquitous, budget-friendly 20×20 inch feather or down-alternative pillow inserts without awkward slack or overstretching.
- Cohesive Decor Harmony: Pairs effortlessly with our popular Braided Cable Crochet Blanket and seasonal accents like the Harvest Ribbed Pumpkins.
Materials & Studio Specifications

- Yarn: Category 4 Medium Worsted Weight Yarn (Wool or Premium Acrylic Blend). Approximately 1,025 yards (500 g / 5 balls of 100g each) per 20-inch pillow. For fiber insights, review our Essential Crochet Yarn Weights Guide.
- Crochet Hook: 5.0 mm (US Size H/8) ergonomic wooden or aluminum hook (or size required to obtain exact gauge). Check standard hook conversions in our Crochet Hook Sizes Guide.
- Pillow Form: 20×20 inch (51×51 cm) square down-alternative or firm polyester pillow form.
- Notions: Steel tapestry needle for weaving ends, 4 locking stitch markers, flexible vinyl measuring tape, and sharp thread snips.
- Finished Dimensions: Approximately 20 inches (51 cm) square after seaming.
- Gauge: 14 double crochets and 7 rows = 4×4 inches (10×10 cm) worked in flat double crochet.
Essential Tools for Crisp Bobble Definition
To maintain uniform bobble tension and achieve crisp 90-degree pillow corners, our atelier team relies on these studio-tested notions:
Clover Amour Ergonomic Hook (Size H / 5.0mm)
Features an ultra-smooth aluminum barrel and comfortable elastomer grip that glides effortlessly through 5-loop bobble cluster pulls without splitting yarn plies.
Utopia Bedding 20×20 Pillow Inserts (Pack of 2)
Plump, high-resilience siliconized polyester fiberfill inserts that fill out crochet pillow corners squarely without sagging or lumpiness.
As an Amazon Associate, Palace Cravings earns from qualifying purchases at zero added cost to you.
Stitch Abbreviations & Bobble Geometry
- ch: Chain
- sc: Single crochet
- dc: Double crochet
- sl st: Slip stitch
- RS / WS: Right side / Wrong side
- Bobble (5-dc Cluster): [Yarn over hook, insert hook in indicated stitch, yarn over and draw up a loop, yarn over and draw through 2 loops on hook] 5 times in the same stitch (6 loops remain on hook). Yarn over and draw through all 6 loops on hook. Push the cluster firmly toward the RS.
- Reverse sc (Crab Stitch): Insert hook in stitch to the right (working backwards from left to right), yarn over, pull up a loop, yarn over and draw through both loops on hook.
Because bobble stitches consume substantial yardage and draw surrounding stitches slightly inward, establishing exact starting stitch counts ensures your finished square measures precisely 20×20 inches. Here is the dimensional matrix for reference:
| Panel | Starting Chain | Working Stitches | Bobbles Per Texture Row | Finished Dimensions |
|---|---|---|---|---|
| Front Panel | Ch 68 | 66 dc | 16 bobbles (alternating 15) | 20×20 in. (51×51 cm) |
| Back Panel | Ch 68 | 66 dc | 16 bobbles (or solid dc) | 20×20 in. (51×51 cm) |
Step-by-Step Pattern Walkthrough
Phase 1: Foundation & Row 1 Base
Foundation: With 5.0 mm hook and your primary color (Mustard Gold or Winter White), ch 68 loosely.
Row 1 (WS): 1 dc in 4th ch from hook (the skipped 3 chains count as your first dc). 1 dc in each remaining ch across to the end. Turn. [66 dc].

Phase 2: The 4-Row Bobble & DC Rhythm
Row 2 (RS – Bobble Row A): Ch 1. 1 sc in each of first 3 dc. *Bobble in next dc, 1 sc in each of next 3 dc. Repeat from * across to last 2 sts. 1 sc in each of last 2 sts. Turn. [16 Bobbles, 50 sc].
Row 3 (WS): Ch 3 (counts as first dc here and throughout). 1 dc in each st across to end of row (be sure to work into the top of each bobble cluster and each sc). Turn. [66 dc].
Row 4 (RS – Bobble Row B – Staggered): Ch 1. 1 sc in each of first 5 dc. *Bobble in next dc, 1 sc in each of next 3 dc. Repeat from * across to last 4 sts. 1 sc in each of last 4 sts. Turn. [15 Bobbles, 51 sc].
Row 5 (WS): Ch 3. 1 dc in each st across to end of row. Turn. [66 dc].
Pattern Repeat: Repeat Rows 2 through 5 consecutively until your piece measures approximately 20 inches (51 cm) from the foundation edge, concluding on a RS row. Fasten off.
Back Panel: Repeat the above instructions to create an identical second panel. (For a two-tone minimalist look, you can work the back panel entirely in solid double crochet rows, or use a contrasting cream shade as shown in our How to Change Colors in Crochet Guide).
Phase 3: Assembly & Cushion Insertion
Align both panels with wrong sides (WS) facing each other, so the raised bobbles face outward on front and back. Secure all four corners with locking stitch markers.
Joining Round 1: Join yarn with a slip stitch into any corner stitch. Ch 1. Working through both thicknesses simultaneously, single crochet evenly around 3 sides of the pillow, placing 3 sc in each corner to turn cleanly. Slide the 20-inch square pillow form gently into the open pocket, smoothing out the corners. Continue single crocheting across the 4th side through both panels to seal the form securely. Join with sl st to the first sc.
Phase 4: The Crab Stitch (Reverse SC) Corded Border
Joining Round 2: Ch 1. Do not turn work. Working in reverse from left to right (clockwise around the cushion), work 1 reverse single crochet (crab stitch) in each sc around the entire perimeter. The crab stitch creates a sturdy, spiraled rope edge that protects the pillow seams from friction. Join with sl st to the initial chain. Fasten off and weave in all yarn tails seamlessly with a tapestry needle.
3 Atelier Secrets for Flawless Bobble Geometry
1. The “Push Forward” Finger Pop: Always work your bobble clusters on the Right Side (RS) and use your non-dominant middle finger behind the fabric to press the plump yarn globe firmly toward you before cinching the closing loop. This locks the dome into a permanent convex relief that will never invert when sat against.
2. Consistent Loop Pull Height: When working the 5 incomplete double crochets, pull each loop up to the full height of your row. If you pull too tightly, the surrounding single crochets will cup inward, creating an undulating, uneven panel width. If you find your edges curling, practice calibrating tension with our Hook Grip & Tension Control Guide.
3. Corner Math for True 90-Degree Angles: Never cut corners on the join round. Working exactly 3 single crochets into the apex stitch of each corner prevents the pillow ears from rounding off, delivering sharp, tailored upholstery-grade edges.
Living Room Styling & Color Palettes

The rich tactile nature of bobble cushions makes them effortless chameleons across diverse interior design styles:
- Modern Organic / Scandinavian: Pair the winter white bobble pillow with natural oak furniture, stone ceramic vases, and an olive ficus tree for calm, layered neutral sophistication.
- Warm Autumn Farmhouse: Style the mustard gold cushion alongside terracotta wool throws and rustic wood platters to infuse harvest vitality into seating arrangements.
- Monochrome Minimalist: Work front and back panels in matching slate charcoal or heather gray to let pure shadow play define the textural aesthetic.
Care, Washing & Long-Term Maintenance
- Spot Cleaning: For everyday dust and pet dander, gently brush the bobbles with a soft-bristle garment brush or vacuum with an upholstery attachment.
- Hand Washing: If thorough laundering is needed, submerge the cushion in cool water with a mild no-rinse wool wash. Gently press suds through the weave without scrubbing or twisting the raised bobbles.
- Air Drying: Roll the pillow in a clean cotton bath towel to press out excess moisture. Lay flat to dry in a well-ventilated, shaded area away from direct radiators or hot sunlight.
Frequently Asked Questions
Can I install a zipper instead of seaming all four sides shut?
Yes! If you prefer a removable cushion cover, work the crab stitch border around three sides only. Along the fourth side, install an 18-inch hidden nylon zipper or crochet a 3-inch ribbed button flap using six 1-inch wooden toggle buttons.
Why are my bobbles popping through to the wrong side of the cushion?
Because the bobble is formed between single crochets worked on the RS, naturally tensioned clusters can occasionally push toward the back. Simply use your index finger to press each popcorn sphere firmly toward the front right after completing the row.
Can I use a larger hook size for a looser drape?
For pillow covers, maintaining a firm, dense gauge is vital. If your hook is too large, the pillow form fabric will peek through the spaces between double crochets. Stick to a 5.0 mm hook (or size down to 4.5 mm) for opaque, professional coverage.
Pin This Pattern for Later
Love this modern home decor project? Save these pins to your crochet blankets and home decor Pinterest boards so you have the stitch counts, sizing matrix, and assembly tutorial ready whenever your living room needs a cozy refresh!

