

There is an effortless seasonal elegance to handmade autumn decor—the rich, silky luster of worsted yarn, the soothing rhythm of expanding stitches, and the timeless beauty of heirloom botanical shapes arranged on a harvest table. This atelier master guide walks you through crocheting deeply contoured, seamless three-dimensional pumpkins in three versatile sizes, topped with a ribbed back-loop stem for genuine rustic charm.
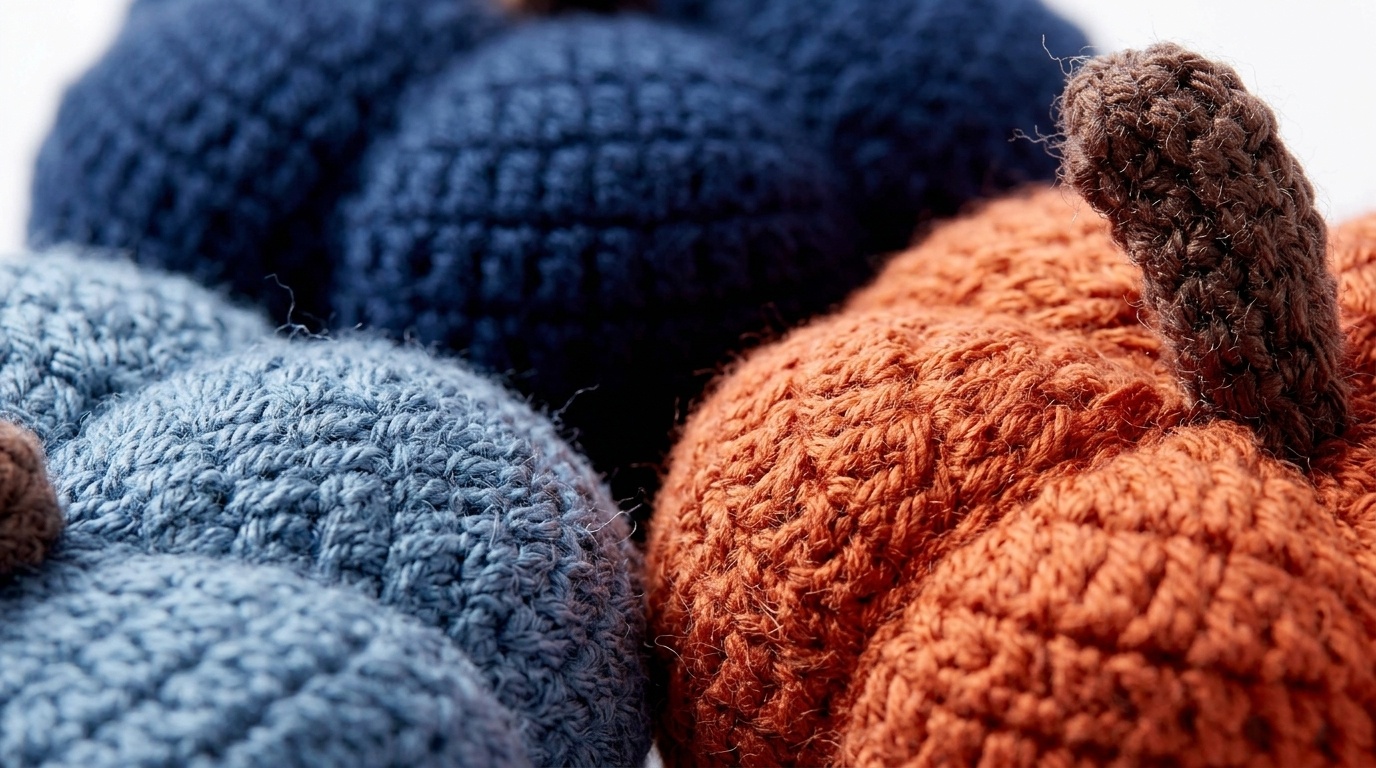
Unlike basic crochet pumpkins that require you to stitch a flat ribbed rectangle and awkwardly cinch heavy strands with a tapestry needle, the genuine Caron Harvest design achieves its voluptuous, natural lobes directly through in-the-round stitch geometry. By placing pairs of single crochets between billowing double crochet fan sections, the fabric automatically pushes outward into plump lobes while forming distinct vertical crease valleys—yielding an authentic, boutique-grade squash silhouette right off your hook.
Why You’ll Love This Authentic Harvest Pumpkin Pattern
- True 3D Construction in the Round: No bunching or seaming flat panels—the organic pumpkin shape blossoms smoothly from a center ring with rhythmic increase and decrease rounds.
- Three Cohesive Table Sizes: Crochet a complete coordinated autumn trio (Small 4.5″, Medium 7″, and Large 9″) using the exact same foundation stitch formula.
- Heirloom Botanical Proportions: Engineered with balanced stitch gauge and reliable structural shaping to hold its plump contour year after year.
- Ribbed Back-Loop Stem: Finished with a textured, folded single-crochet back-loop stem in contrasting taupe that anchors the botanical profile with tailored sophistication.
Key Materials & Tested Studio Tools

- Body Yarn (Contrast A): 1 ball of Caron Simply Soft (6 oz/170.1 g; 315 yds/288 m, 100% acrylic) in Pumpkin (39765), Off White (39702), Country Blue (39710), Light Country Blue (39709), or Dark Country Blue (39711).
- Stem Yarn (Contrast B): 1 ball of Caron Simply Soft in Taupe (39783) for the woodland stem.
- Crochet Hook: Size U.S. H/8 (5.0 mm) ergonomic crochet hook, or size needed to obtain gauge.
- Stuffing: Premium hypoallergenic polyester fiberfill (stuff firmly for defined lobes).
- Finishing Notions: Large-eye bent tapestry needle, locking stitch marker, and sharp detail scissors.
Smart Fiber Swaps: While Caron Simply Soft provides that signature soft sheen and fluid stitch definition, you can substitute any quality Category 4 worsted acrylic or acrylic-wool blend (such as Lion Brand Heartland or Patons Classic Wool). For beginners exploring yarn weights, review our foundational guide on How to Crochet Step-by-Step for Beginners.
Transparency Note: This guide contains hand-curated affiliate links to tested studio tools. As an Amazon Associate, we earn from qualifying purchases at zero additional cost to you. We strictly recommend professional-grade essentials verified in our atelier.
Crocheting rounded 3D amigurumi and botanical shapes requires consistent tension and snag-free glide. Here are the top-rated, studio-verified essentials to ensure your harvest pumpkins look crisp, even, and professionally finished:
The gold standard in ergonomic comfort. The smooth elastomer grip and polished matte aluminum throat glide through Caron Simply Soft without catching or splitting fibers.
 →
100% premium polyester fiber with superior resiliency. Fluffs smoothly into soft, cloud-like clumps to prevent hollow spots and retain firm pumpkin lobe contours season after season.
→
Curved tips glide effortlessly under tight stitches, making cinching the final pumpkin crown and securing the stem seam smooth, secure, and completely invisible.
→
Smooth locking safety pins that will never snag delicate worsted fibers. Invaluable for marking round beginnings and tracking increase intervals in the round.
→
Pumpkin Size Options & Dimensional Specifications
The beauty of this versatile autumn design is its modular scalability. Working with the standard studio gauge of 13 single crochet (sc) and 14 rows = 4 inches [10 cm] on a 5.0 mm hook, you can produce three distinct proportions suited for table centerpieces, mantel arrangements, or tiered shelf displays:
| Pumpkin Size | Finished Dimensions (Dia x H) | Peak Stitch Count | Body Rounds Count | Yarn Estimate (Contrast A) |
|---|---|---|---|---|
| Small Harvest Pumpkin | Approx 4.5″ [11.5 cm] dia x 3″ [7.5 cm] tall | 50 stitches | 11 total rounds | ~55 yds (0.3 ball) |
| Medium Harvest Pumpkin | Approx 7″ [18 cm] dia x 4″ [10 cm] tall | 80 stitches | 17 total rounds | ~110 yds (0.5 ball) |
| Large Harvest Pumpkin | Approx 9″ [23 cm] dia x 5.5″ [14 cm] tall | 80 stitches | 21 total rounds | ~175 yds (0.7 ball) |
Step-by-Step Crochet Walkthrough & Pattern Instructions
Follow our detailed step-by-step instructions below. Stitches are worked in joined rounds; do not turn at the end of rounds unless specified.

Abbreviations & Special Stitches
- Ch: Chain
- Sc: Single crochet
- Dc: Double crochet
- Sl st: Slip stitch
- Rnd(s): Round(s)
- Dc2tog (Double Crochet 2 Together): (Yarn over hook and draw up a loop in next stitch. Yoh and draw through 2 loops on hook) twice. Yoh and draw through all 3 loops on hook.
- Sc2tog (Single Crochet 2 Together): Draw up a loop in each of next 2 stitches. Yoh and draw through all loops on hook.
Base Foundation & Expansion (All Sizes: Rounds 1 to 5)
With Contrast A (Pumpkin, Off White, or Country Blue), ch 2.
1st Rnd: 10 sc in 2nd ch from hook. Join with sl st to first sc. (10 sc).
2nd Rnd: Ch 1. 2 sc in first sc. *2 dc in next sc. 2 sc in next sc. Rep from * to last st. 2 dc in last sc. Join with sl st to first sc. (20 sts).
3rd Rnd: Ch 1. 1 sc in first sc. *(1 sc. 1 dc) all in next sc. 1 dc in next dc. 2 dc in next dc. 1 sc in next sc. Rep from * 3 more times. (1 sc. 1 dc) all in next sc. 1 dc in next dc. 2 dc in last dc. Join with sl st to first sc. (30 sts).
4th Rnd: Ch 1. 1 sc in each of first 2 sc. *2 dc in next dc. 1 dc in each of next 2 dc. 2 dc in next dc. 1 sc in each of next 2 sc. Rep from * 3 more times. 2 dc in next dc. 1 dc in each of next 2 dc. 2 dc in next dc. Join with sl st to first sc. (40 sts).
5th Rnd: Ch 1. 1 sc in each of first 2 sc. *1 dc in next dc. 2 dc in next dc. 1 dc in each of next 3 dc. 2 dc in next dc. 1 sc in each of next 2 sc. Rep from * 3 more times. 1 dc in next dc. 2 dc in next dc. 1 dc in each of next 3 dc. 2 dc in next dc. Join with sl st to first sc. (50 sts).
Small Pumpkin Body
6th Rnd: Ch 1. 1 sc in each of first 2 sc. *1 dc in each of next 8 dc. 1 sc in each of next 2 sc. Rep from * 3 more times. 1 dc in each of last 8 dc. Join with sl st to first sc.
Rounds 7–11: Repeat 6th rnd 5 more times. Proceed directly to All Sizes Decrease Rounds.
Medium and Large Pumpkins Expansion
6th Rnd: Ch 1. 1 sc in each of first 2 sc. *1 dc in each of next 2 dc. 2 dc in next dc. 1 dc in each of next 4 dc. 2 dc in next dc. 1 sc in each of next 2 sc. Rep from * 3 more times. 1 dc in each of next 2 dc. 2 dc in next dc. 1 dc in each of next 4 dc. 2 dc in next dc. Join with sl st to first sc. (60 sts).
7th Rnd: Ch 1. 1 sc in each of first 2 sc. *1 dc in each of next 3 dc. 2 dc in next dc. 1 dc in each of next 5 dc. 2 dc in next dc. 1 sc in each of next 2 sc. Rep from * 3 more times. 1 dc in each of next 3 dc. 2 dc in next dc. 1 dc in each of next 5 dc. 2 dc in next dc. Join with sl st to first sc. (70 sts).
8th Rnd: Ch 1. 1 sc in each of first 2 sc. *1 dc in each of next 4 dc. 2 dc in next dc. 1 dc in each of next 6 dc. 2 dc in next dc. 1 sc in each of next 2 sc. Rep from * 3 more times. 1 dc in each of next 4 dc. 2 dc in next dc. 1 dc in each of next 6 dc. 2 dc in next dc. Join with sl st to first sc. (80 sts).
9th Rnd: Ch 1. 1 sc in each of first 2 sc. *1 dc in each of next 14 dc. 1 sc in each of next 2 sc. Rep from * 3 more times. 1 dc in each of last 14 dc. Join with sl st to first sc.
Medium Pumpkin Body Repeats: Repeat 9th rnd 5 more times (total 6 rounds of 9th rnd pattern).
Large Pumpkin Body Repeats: Repeat 9th rnd 7 more times (total 8 rounds of 9th rnd pattern).
Medium and Large Pumpkins Initial Decreases
1st Dec Rnd: Ch 1. 1 sc in each of first 2 sc. *1 dc in each of next 4 dc. Dc2tog. 1 dc in each of next 6 dc. Dc2tog. 1 sc in each of next 2 sc. Rep from * 3 more times. 1 dc in each of next 4 dc. Dc2tog. 1 dc in each of next 6 dc. Dc2tog. Join with sl st to first sc. (70 sts).
2nd Dec Rnd: Ch 1. 1 sc in each of first 2 sc. *1 dc in each of next 3 dc. Dc2tog. 1 dc in each of next 5 dc. Dc2tog. 1 sc in each of next 2 sc. Rep from * 3 more times. 1 dc in each of next 3 dc. Dc2tog. 1 dc in each of next 5 dc. Dc2tog. Join with sl st to first sc. (60 sts).
3rd Dec Rnd: Ch 1. 1 sc in each of first 2 sc. *1 dc in each of next 2 dc. Dc2tog. 1 dc in each of next 4 dc. Dc2tog. 1 sc in each of next 2 sc. Rep from * 3 more times. 1 dc in each of next 2 dc. Dc2tog. 1 dc in each of next 4 dc. Dc2tog. Join with sl st to first sc. (50 sts).
Final Decrease Rounds (All Sizes)
1st Rnd: Ch 1. 1 sc in each of first 2 sc. *1 dc in next dc. Dc2tog. 1 dc in each of next 3 dc. Dc2tog. 1 sc in each of next 2 sc. Rep from * 3 more times. 1 dc in next dc. Dc2tog. 1 dc in each of next 3 dc. Dc2tog. Join with sl st to first sc. (40 sts).
2nd Rnd: Ch 1. 1 sc in each of first 2 sc. *Dc2tog. 1 dc in each of next 2 dc. Dc2tog. 1 sc in each of next 2 sc. Rep from * 3 more times. Dc2tog. 1 dc in each of next 2 dc. Dc2tog. Join with sl st to first sc. (30 sts).
Studio Assembly Note: Insert polyester fiberfill firmly at this point. Distribute stuffing outward toward the lobe curves to fill each pocket evenly.
3rd Rnd: Ch 1. 1 sc in first sc. *Sc2tog. 1 dc in next dc. Dc2tog. 1 sc in next sc. Rep from * 3 more times. Sc2tog. 1 dc in next dc. Dc2tog. Join with sl st to first sc. (20 sts).
4th Rnd: Ch 1. (Sc2tog) 10 times. Join with sl st to first st. (10 sts).
Fasten off, leaving an 18-inch long tail. Thread tail through remaining 10 stitches, pull tightly to cinch opening completely closed, and knot securely.
Textured Ribbed Stem (Worked Flat in Back Loop Only)
With Contrast B (Taupe), ch 10.
1st Row: 1 sc in 2nd ch from hook. 1 sc in each ch to end of chain. Turn. (9 sc).
2nd Row: Ch 1. Working in back loop only (BLO) of each stitch across, work 1 sc in each st to end of row. Turn.
Repeat 2nd row until work from beginning measures approximately 1.5 inches [4 cm]. Fasten off, leaving a long seaming tail.
Stem Finishing: Fold stem in half lengthwise. Using your tapestry needle and the yarn tail, whipstitch around the top and side edges to form a firm cylindrical stem. Sew bottom open edge firmly to the gathered top center of the pumpkin. Weave all loose ends securely inside the fiberfill core.
3 Designer Secrets for Flawless Harvest Pumpkins
1. Maintain Firm, Uniform Stitch Gauge: Because this pattern builds lobes using contrasting heights (single crochet valleys and double crochet hills), keeping your tension slightly snug prevents fiberfill from peeking through the double crochets. If you naturally crochet on the looser side, consider dropping down to a 4.5 mm (US 7) hook for an ultra-dense, polished fabric texture.
2. Fluff Polyfill into Small Micro-Tufts: Stuffing your pumpkin with one large compressed clump creates unsightly internal lumps that distort the symmetrical curves. Pull the fiberfill apart into small, airy clouds before packing. Stuff the outer circumference first, then firmly pack the center core so the lobes flare with natural plumpness. For more 3D fiberfill shaping techniques, see our popular Crochet Christmas Stocking Pattern.
3. Use the Tail to Cinch the Base Indentation: For an extra botanical touch, after closing the top and bottom openings, thread your long yarn tail right through the center of the pumpkin from top to bottom and tug gently. This subtle tension creates a gentle concave dip at the stem and base, mimicking true farm-grown heirloom heirloom squash.
Styling & Farmhouse Home Decor Inspiration

These harvest pumpkins transition seamlessly throughout the entire autumn season from early September through Thanksgiving dinner. Here are our favorite ways to style them around the home:
- Tiered Tray Vignettes: Arrange the Small and Medium pumpkins on a galvanized or white wood tiered tray alongside our textured Rustic Sunflower Coasters and cinnamon-scented tea lights.
- Dining Centerpiece Runner: Disperse five pumpkins along a natural burlap or cream linen table runner, interspersed with dried wheat bundles, eucalyptus leaves, and mini white pinecones.
- Boho Living Room Accent: Pair slate blue and cream pumpkins near indoor potted plants hung from our handcrafted Boho Fringe Plant Hanger for a soothing, textural bohemian sanctuary. For everyday kitchen textile harmony, pair with our Easy Crochet Dishcloth Pattern.
Care, Spot Cleaning & Seasonal Storage Guide
- Dust Maintenance: Over the holiday season, gently tap the pumpkins or use a soft lint roller to lift loose dust without snagging the acrylic yarn fibers.
- Spot Cleaning: If a holiday dinner mishap occurs, spot clean immediately using a clean microfiber cloth dampened with cool water and mild wool wash. Dab gently—never scrub or submerge the entire stuffed pumpkin in water.
- Off-Season Storage: Store in a breathable cotton or canvas storage tote rather than airtight plastic bins to prevent moisture entrapment. Place a cedar block or lavender sachet inside the tote to keep fibers fresh all year long. To refresh yarn shapes after seasonal storage, review our guide on How to Block Crochet & Finish Edges.
Frequently Asked Questions
What makes this Caron Harvest pattern different from flat ribbed rectangle pumpkins?
Flat rectangle pumpkins are worked in simple rows and then cinched at both ends with heavy yarn wraps to create artificial grooves. The Caron Harvest pattern builds lobes organically in the round through alternating heights of double crochets and single crochets, yielding smoother, true-to-life contours with zero exterior wrapping needed.
Can I use a real cinnamon stick instead of the crocheted taupe stem?
Yes! While the official pattern includes a tailored single-crochet back-loop taupe stem, you can easily substitute a 3-inch aromatic cinnamon stick or a natural birch wood twig. Simply cinch round 4 of the decreases around the base of the stick and secure with a dab of craft fabric adhesive.
How do I prevent the fiberfill from showing between double crochet stitches?
Maintain snug tension throughout the double crochet lobe repeats. If your stitches naturally tend to be loose, downsize your hook by 0.5 mm to a 4.5 mm (US 7) hook. Additionally, choosing a polyester fiberfill that matches your yarn shade (or inserting a small swatch of matching pantyhose or fabric around the stuffing) prevents white polyester from showing.
How do I ensure my pumpkin sits completely flat without wobbling?
When closing the bottom foundation circle and weaving your tail, press the base firmly against a flat tabletop before knotting. Cinching the yarn slightly inward forms a natural, stable resting dimple that prevents rolling on mantels and tiered trays.
Save This Free Pattern to Pinterest
Love these authentic Caron Harvest Crochet Pumpkins? Save these atelier visual guides to your favorite Pinterest boards so you have the row-by-row instructions and sizing matrix ready whenever your autumn crafting inspiration strikes!

