

There is a nostalgic magic in hanging a handmade stocking by the hearth on Christmas Eve, especially one crafted with the weighty, architectural drape of raised diamond post stitches. Designed to become a cherished family keepsake passed down through generations, this textured heirloom crochet Christmas stocking combines a plush fold-over ribbed cuff in deep mulled-wine burgundy with an intricate natural cream diamond body and a minimalist tan leather hanging loop. Whether you are outfitting your holiday mantel for the first time or creating coordinated heirloom stockings for the whole family, this free step-by-step pattern delivers boutique artisan elegance with clear, stress-free construction.
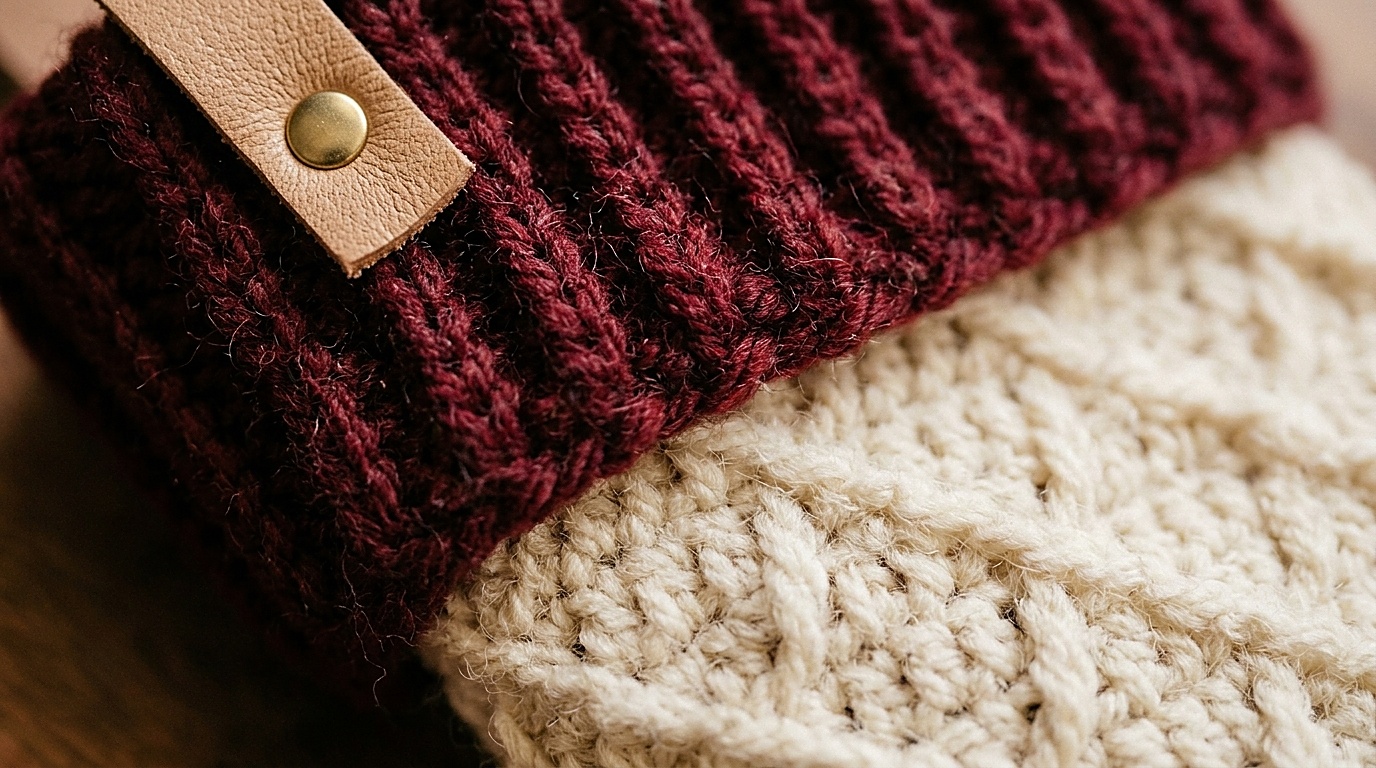
In our fiber studio, holiday textiles must satisfy two non-negotiable criteria: unmistakable tactile beauty and rugged structural integrity capable of holding generous treats without stretching out of shape. The main leg and foot are worked using an interlocking diamond alpine post-stitch sequence that produces a dense, quilted fabric with virtually zero sag. By pairing structured worsted-weight wool with a clean German short-row heel turn, you eliminate bulky corner gaps and create a smooth, tailored stocking silhouette that looks stunning from every angle.
Terminology Disclosure: This pattern is written using standard US crochet terms and US terminology throughout.
Why You’ll Love This Heirloom Christmas Stocking
- Sag-Proof Quilted Texture: The raised diamond post stitches form a dense, thick fabric framework that holds its elegant shape beautifully, even when loaded with heavy apples, books, and stocking stuffers.
- Seamless German Short-Row Heel: No cumbersome seaming or awkward side holes; our continuous short-row technique creates a curved, rounded heel pocket in deep holiday burgundy.
- Modern Artisan Leather Loop: A sleek natural tan leather strap secured with an antiqued brass Chicago screw rivet elevates the finished stocking to high-end boutique quality.
- Adaptable Sizing: Easily scaled from a dainty mantle keepsake to an oversized family Santa sack. Pair your stocking alongside our rustic holiday home decor for a warm, unified festive living room.
Stocking Dimensions & Exact Yarn Calculations
To assist in holiday project planning, we have calculated the exact starting chains, stitch counts, and finished measurements for three distinct stocking sizes. The diamond stitch repeat requires a multiple of 4 stitches in the round:
Swipe left or right to view all sizing details.
| Stocking Size | Finished Dimensions (Inches / CM) | Starting Cuff Rows & Stitch Count | Estimated Yardage (#4 Worsted) |
|---|---|---|---|
| Mini Keepsake Stocking | 5 in. wide × 12 in. long (13 × 30 cm) | Chain 13 for cuff; 32 rounds | 130 yds Cream / 60 yds Burgundy |
| Standard Heirloom Stocking | 7 in. wide × 18 in. long (18 × 46 cm) | Chain 17 for cuff; 44 rounds | 240 yds Cream / 110 yds Burgundy |
| Oversized Family Stocking | 8.5 in. wide × 22 in. long (22 × 56 cm) | Chain 21 for cuff; 56 rounds | 360 yds Cream / 160 yds Burgundy |
Detailed Stitch Counts & Starting Instructions by Stocking Size
To ensure perfect execution across all sizes, use the following starting chains and row specifications:
- Mini Keepsake Stocking: For mini stocking, chain 13 to begin ribbed cuff. Work 32 cuff ribbing rows, join into a ring, and establish a foundation round of 32 stitches. Work 16 leg rounds, short-row heel on 16 stitches, 12 foot rounds, and 4 toe decrease rounds.
- Standard Heirloom Stocking: For standard stocking, chain 17 to begin ribbed cuff. Work 44 cuff ribbing rows, join into a ring, and establish a foundation round of 44 stitches. Work 24 leg rounds, short-row heel on 22 stitches, 18 foot rounds, and 6 toe decrease rounds.
- Oversized Family Stocking: For oversized stocking, chain 21 to begin ribbed cuff. Work 56 cuff ribbing rows, join into a ring, and establish a foundation round of 56 stitches. Work 30 leg rounds, short-row heel on 28 stitches, 24 foot rounds, and 8 toe decrease rounds.
Studio Supplies & Hook Calibration

- Yarn Weight & Palette: Worsted Weight (#4). Recommended: 100% Peruvian highland wool or a resilient 80% acrylic / 20% wool blend in Antique Cream (Color A) and Deep Mulled Burgundy (Color B). For selecting sturdy, non-pilling fibers, consult our yarn weight and hook conversion guide.
- Crochet Hooks: 4.5 mm (US Size 7) wooden or ergonomic aluminum hook for the textured body and 4.0 mm (US Size G/6) for the dense ribbed cuff.
- Hardware & Notions: 1/2-inch wide natural vegetable-tanned leather strip (6 inches / 15 cm long), 1 brass screw-back button stud rivet (Chicago screw), sharp rotary hole punch, locking stitch markers, and a bent-tip tapestry needle.
- Gauge Swatch: 16 stitches × 14 rows = 4 in. × 4 in. (10 × 10 cm) measured in diamond alpine post-stitch pattern using the 4.5mm hook after light steam blocking.
Pattern Note on Turning Chains: The turning chain does not count as a stitch throughout this entire pattern.
Step-by-Step Construction Walkthrough
Follow these precise instructions to craft the standard 18-inch heirloom stocking. Stitches used: Chain (ch), Single Crochet (sc), Double Crochet (dc), Front Post Treble Crochet (fptr), Slip Stitch (sl st), and Single Crochet Two Together (sc2tog).
Section 1: The Fold-Over Ribbed Cuff (Color B – Burgundy): With 4.0mm hook, chain 17. Work 1 sc in 2nd ch from hook and each ch across (16 sc). *Chain 1, turn; work 1 sc in back loop only (blo) of each stitch across.* Repeat from * to * for 44 total rows. Fold cuff strip in half, aligning Row 1 with Row 44, and slip stitch the short ends together to create a flexible ribbed cylinder. Do not fasten off; turn cuff right side out.
Section 2: Establishing The Leg Foundation (Color A – Cream): Switch to 4.5mm hook and attach Color A to the cuff edge with a seamless join; see our tutorial on how to change colors in crochet seamlessly. Rotate work to crochet into the row ends along the bottom circumference of the ribbed cuff. Work 1 sc into each row-end around (44 sc total). Join with sl st to first sc. (Stitch Count: 44 single crochet stitches total).
Section 3: The Interlocking Diamond Alpine Stitch (Leg):
Round 1: Chain 1 (does not count as a stitch), work 1 dc in each stitch around; join with sl st to first dc (44 dc).
Round 2: Chain 1, work 1 sc in each stitch around; join with sl st (44 sc).
Round 3 (Establishing Diamonds): Chain 1, *work 1 fptr around the dc 2 rows below, skip the sc behind it, work 1 sc in next 3 stitches.* Repeat from * to * around; join with sl st (11 diamond points).
Round 4: Chain 1, work 1 sc in each stitch around; join with sl st (44 sc).
Round 5 (Intersecting Diamonds): Chain 1, work 1 sc in first 2 stitches, *work 1 fptr around the same dc post as previous round, work 1 fptr around next dc post, work 1 sc in next 2 stitches.* Repeat from * to * around, forming crisp interlocking diamond lattice windows. Repeat Rounds 2–5 until leg measures 10 inches (25 cm) from bottom of cuff, ending on a Round 4 repeat.

Section 4: The Seamless Short-Row Heel (Color B – Burgundy): Fasten off Color A. Join Color B across the first 22 stitches (heel stitches), leaving the remaining 22 instep stitches unworked on a stitch marker. Work turned short-rows: sc across, leaving 1 unworked stitch at each turn until 8 center stitches remain, then reverse back outward by picking up the turned loops. This forms a smooth 90-degree anatomical heel pocket without cutting yarn.
Section 5: Foot & Wedge Toe: Switch back to Color A and work in the round across the 22 instep stitches and 22 heel stitches (44 stitches total). Continue the diamond alpine stitch pattern for 18 rounds until foot measures 6.5 inches from heel turn. Switch to Color B for toe shaping: *sc 9, sc2tog* around for 6 rounds until 12 stitches remain.
Finishing & Leather Hanging Loop: Fasten off, cut yarn leaving an 8-inch tail, and weave in all ends securely using a blunt tapestry needle. Use the yarn tail to cinch the remaining 12 toe stitches tightly closed in a circular draw. Fold the 6-inch natural leather strip in half, punch matching holes through the leather and cuff seam, and tighten the antiqued brass Chicago screw rivet firmly in place.
Elena’s Atelier Secrets: Preventing Stitch Distortion & Cuff Flare
- Keep Post Loops Level: When pulling up the loop for a front post treble crochet, pull the loop up to the height of the current working row. If you keep tension too tight, the fabric will pucker inward; if too loose, the diamond lines will sag. For more texture tips, explore our guide to ribbed and post-stitch mechanics.
- Steam Blocking for Crisp Relief: Never press an iron onto acrylic or wool post stitches. Hover a garment steamer 1 to 2 inches away and gently pat the diamond ridges flat with your fingertips; learn proper blocking protocol in our blocking and edge-finishing guide.
- Leather Loop Placement: Always mount the leather hanging loop directly over the rear cuff seam. This conceals the color join and ensures the stocking hangs facing toward the room when suspended from a fireplace mantel hook.
Artisan Mantel Styling & Holiday Living Spaces

The organic warmth of chunky crochet textiles brings authentic Scandinavian hygge to holiday interiors. Hang your stocking from cast-iron fireplace stocking holders nestled amidst fresh cedar boughs, dried orange slices, and warm twinkling fairy lights. For a balanced holiday aesthetic across open-concept spaces, fold our companion chunky waffle stitch throw blanket across the sofa nearby to echo the rich cream and textured woolen tones.
Laundering, Care & Off-Season Heirloom Storage
To preserve your stockings for decades of family holiday memories, follow these archival care guidelines:
- Detachable Leather Cleaning: Unscrew the brass Chicago rivet before washing to protect the natural leather from water spotting.
- Gentle Hand Wash: Submerge in tepid water with a splash of no-rinse wool wash. Gently squeeze water through the fibers without twisting or wringing.
- Flat Air Drying: Lay flat on a clean dry towel and gently shape the foot and cuff into a crisp right angle. Allow to air dry away from direct heat sources.
- Cedar Storage: Pack inside a breathable cotton garment bag with natural cedar blocks to prevent moth damage during the off-season.
Maker Troubleshooting: Stocking Pitfalls & Solutions
Why is my stocking leg twisting as I crochet in the round?
Post stitches naturally carry a slight rightward lean. To prevent spiral skew, alternate joining direction or ensure you work straight into the true skipped single crochet behind each post stitch.
Can I line this stocking with fabric?
Yes! The diamond alpine stitch is already thick and opaque, but stitching a simple cotton muslin liner into the interior under the cuff adds extra load-bearing support for heavier stocking surprises.
Save This Heirloom Stocking Pattern to Pinterest
Save these high-resolution pattern guides to your holiday Pinterest boards so you always have the complete sizing chart, stitch walkthrough, and leather rivet instructions ready for your festive crafting sessions!

