

Corner to Corner crochet—widely celebrated in the fiber arts community as C2C—is an ingenious geometric technique that builds fabric diagonally from one corner to the opposite corner in a seamless cascade of textured square tiles. Unlike traditional blankets that require chaining hundreds of foundation stitches prone to curling, twisting, or miscounting, C2C begins from a humble foundation of a single block. From there, your project expands row by row with mathematical precision, allowing you to watch your blanket grow organically while maintaining complete control over its final dimensions, drape, and color progression.
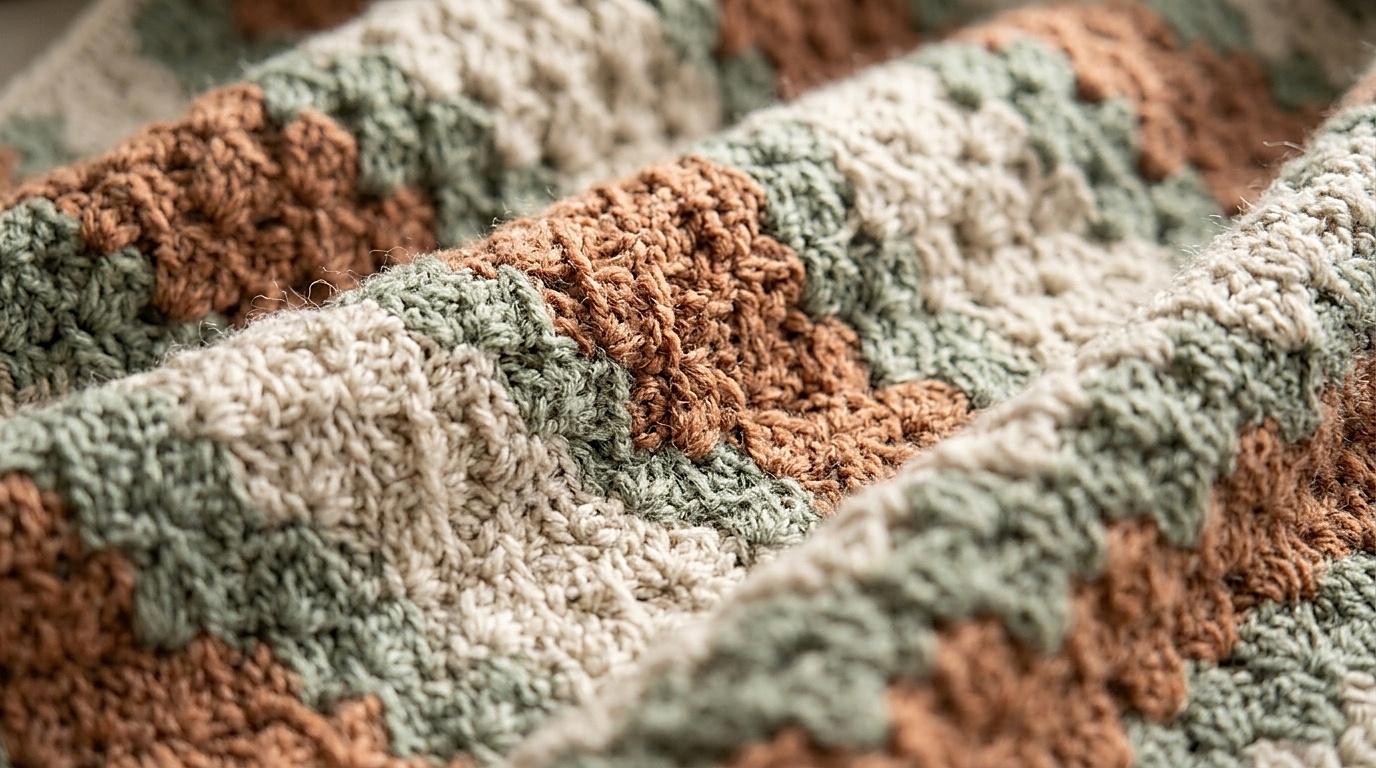
What makes C2C so beloved among modern crocheters is its perfect union of simplicity and creative freedom. Every single block throughout the entire project follows the exact same mechanical formula: 1 slip stitch + 3 chains + 3 double crochets. Once you master the rhythm of increasing at the edges and executing clean slip-stitch corner decreases, the stitch pattern becomes pure muscle memory. In this definitive masterclass, we explore the exact geometry of diagonal tiles, provide an exhaustive sizing and yardage matrix, walk through row-by-row instructions with zero guesswork, and reveal pro techniques for clean color joins and level borders.
Diagonal vs. Linear Crochet: Why C2C Changes Everything
If you have ever spent hours chaining 200 stitches for a standard afghan only to realize twenty rows later that your tension was too tight and the bottom edge is bowing into a curved smile, C2C is the antidote. Working on the bias (at a 45-degree angle) offers several distinct advantages:
- Zero Long Foundation Chains: You never have to chain more than 6 stitches at any point in the entire blanket. Tension remains completely uniform from the very first stitch to the final corner.
- Adaptive Sizing Freedom: Because the project grows outward diagonally, you don’t have to commit to an exact blanket width before starting. You simply continue increasing until one edge matches your desired measurement, whether that’s a compact baby car-seat throw or a generous living room lapghan.
- Multidirectional Mechanical Drape: Standard rows of double crochet have stretch in only one direction. In C2C, each tile sits perpendicular to its neighbor. This alternating vertical and horizontal grain creates a squishy, interlocking structure with balanced four-way flexibility that holds its shape through years of use.
- Visual Progress Momentum: The initial rows work up in minutes, creating immediate visual satisfaction and momentum that carries you through the center of the blanket.
The Anatomy of a C2C Diagonal Tile
Before picking up your hook, taking a moment to understand the physical anatomy of an individual C2C tile eliminates the most common beginner mistake: wondering which loops to work into. Each finished block is a self-contained square with four distinct components:
+-------------------------------------------+
|  [Climbing Ladder: Chain-3 Space]         |
|  (Acts as anchor space for the next row)  |
|                                           |
|       [Dc 1]      [Dc 2]      [Dc 3]      |
|  (Worked around the ch-3 loop, not into   |
|   individual stitch tops)                 |
|                                           |
+-----------[Slip Stitch Join]--------------+
(Locks the tile firmly to the neighbor block)
Notice that double crochets are worked around the entire chain-3 loop of the previous row’s tile, rather than through the tight top loops of individual stitches. This makes C2C remarkably fast and easy on the eyes, as your hook effortlessly glides into large, visible spaces.
Comprehensive Blanket Sizing Matrix & Yardage Math
When worked with standard Worsted Weight yarn (Category #4) and a 5.5 mm (US I-9) hook, one standard C2C block measures approximately 0.75 inches × 0.75 inches (1.9 cm × 1.9 cm). Use this reference matrix to accurately calculate your grid dimensions, total block count, and required skein yardage:
| Blanket Size | Target Dimensions | Tile Grid (W × L) | Total Tiles | Approx. Yardage |
|---|---|---|---|---|
| Lovey / Security | 18″ × 18″ (46 × 46 cm) | 24 × 24 tiles | 576 tiles | 420 yds (384 m) |
| Stroller / Car Seat | 30″ × 35″ (76 × 89 cm) | 40 × 47 tiles | 1,880 tiles | 1,350 yds (1,234 m) |
| Crib / Baby Blanket (compare with our easy crochet baby blanket pattern) | 36″ × 36″ (91 × 91 cm) | 48 × 48 tiles | 2,304 tiles | 1,650 yds (1,508 m) |
| Lapghan / Wheelchair | 38″ × 48″ (97 × 122 cm) | 50 × 64 tiles | 3,200 tiles | 2,300 yds (2,103 m) |
| Standard Sofa Throw (or explore our chunky crochet blanket pattern) | 48″ × 60″ (122 × 152 cm) | 64 × 80 tiles | 5,120 tiles | 3,680 yds (3,365 m) |
| Large Afghan / Couch | 60″ × 72″ (152 × 183 cm) | 80 × 96 tiles | 7,680 tiles | 5,500 yds (5,029 m) |
| Twin Bed Spread | 66″ × 90″ (168 × 229 cm) | 88 × 120 tiles | 10,560 tiles | 7,550 yds (6,903 m) |
The Pro Yardage Formula for Custom Dimensions:
If your yarn weight or gauge differs from the chart, work a quick 5 × 5 tile practice swatch (25 total tiles). Weigh the swatch in grams on a kitchen scale to determine the average weight of a single tile: Weight of swatch ÷ 25 = Grams per tile. Multiply grams per tile by your target total tile count, then add a 10% safety cushion for joining, ends, and borders. You will never run short of yarn midway through a project again.
Materials, Yarn Weight & Tool Ergonomics

- Yarn Selection: Worsted Weight (Category #4) is the benchmark standard for C2C blankets (see our crochet yarn weight and hook size guide for gauge charts). Choose smooth, plied acrylic, superwash wool, or cotton blends (such as tested options from our best yarns for crochet blankets review, including Lion Brand Wool-Ease, Caron Simply Soft, or Paintbox Simply Aran). For our sample blanket, we combined Heather Oatmeal Cream, Muted Sage Green, and Warm Terracotta Clay in repeating diagonal bands. Avoid boucle, roving, or fuzzy chenille yarns for your first C2C make, as excessive halo makes locating the ch-3 loops difficult.
- Crochet Hook: US Size I-9 (5.5 mm) or US Size H-8 (5.0 mm). We recommend choosing an ergonomic wooden or rubber-grip hook. Because C2C involves repeated slip stitches into tight corner spaces, an ergonomic grip reduces wrist fatigue across long crafting sessions (learn how to prevent strain in our guide to hook grips and tension).
- Locking Stitch Markers: Essential for marking the designated “decrease side” when working rectangular blankets with unequal length and width.
- Blunt Tapestry Needle: For weaving ends securely down the center cores of double crochet columns.
Phase 1: The Foundation & Increase Phase (Step-by-Step)
During the increase phase, each diagonal row adds exactly one additional tile. Row 1 has 1 tile, Row 2 has 2 tiles, Row 3 has 3 tiles, and Row N has N tiles. Follow this exact progression:
Row 1 (The Corner Starting Tile):
- Chain 6 loosely.
- Work 1 double crochet (dc) into the 4th chain from the hook. (The 3 skipped chains form your initial climbing chain-3 post).
- Work 1 dc into the 5th chain.
- Work 1 dc into the 6th chain.
- Check: You now have exactly 1 diagonal tile consisting of a ch-3 ladder and 3 double crochets. [1 tile]
Row 2 (First Increase Row):
- Chain 6. Turn your work.
- Work 1 dc into the 4th ch from hook, 1 dc in 5th ch, and 1 dc in 6th ch. (This forms your new outer edge tile).
- Now locate the chain-3 turning space at the top of the Row 1 tile. Orient the work so Row 1 sits vertically.
- Insert your hook into that ch-3 space and work 1 slip stitch to anchor the new tile.
- Chain 3 (climbing ladder for the next block).
- Work 3 dc directly into that exact same ch-3 space.
- Check: Row 2 is complete with exactly 2 interlocking tiles. [2 tiles]
Row 3 (Second Increase Row):
- Chain 6. Turn your work.
- Work 1 dc into the 4th, 5th, and 6th chains from hook (outer edge tile).
- Slip stitch into the ch-3 space of the first adjacent tile from Row 2.
- Chain 3, work 3 dc into that same ch-3 space.
- Slip stitch into the ch-3 space of the final tile from Row 2.
- Chain 3, work 3 dc into that same ch-3 space.
- Check: Row 3 is complete with exactly 3 tiles. [3 tiles]
The Universal Increase Formula (Rows 4 to Target Width):
Every increase row begins with: Ch 6, dc in 4th, 5th, 6th ch from hook. You then work across the diagonal row: *Sl st into ch-3 space of next tile, ch 3, 3 dc in same space*, repeating across until you have anchored into and worked out of the final tile’s ch-3 space. Repeat this pattern until the straight edge of your diagonal triangle matches your target blanket width.
Phase 2: Mastering the Corner Decrease (Squaring Your Edges)
The decrease row is the most critical technical pivot in C2C. Instead of chaining 6 to expand outward, you slip stitch across the top edge of the tile to keep the border flat and straight, creating a sharp 90-degree corner.

The Failproof Square Decrease Sequence:
- The Decrease Turn: When you complete the final tile of your maximum width row, do NOT chain 6. Turn your work.
- The Slip-Stitch Glide: Slip stitch loosely into the top of the 2nd dc, the 3rd dc, and into the ch-3 turning space itself (3 slip stitches total). You have now navigated into the ch-3 anchor space without adding any height or width.
- Building the Body: Chain 3, work 3 dc into that ch-3 space. Continue working your standard
*sl st in next ch-3 sp, ch 3, 3 dc in same sp*across the diagonal row. - The Row Finish: When you reach the final tile of the row, slip stitch into its ch-3 space. DO NOT chain 3 and do NOT work 3 dc into this space! Simply stop right here.
- Result: Turn your work. Your tile count has reduced by exactly 1 tile, establishing a straight, clean 90-degree edge. Repeat this decrease on both ends until only 1 final tile remains at the opposite corner.
Decreasing for Rectangles (Unequal Length and Width):
Most blankets are rectangular rather than square (for example, 48 tiles wide by 64 tiles long). When making a rectangle, there is a transitional phase where one edge decreases while the other continues increasing:
1. On the Width Edge (Target width reached): Work a decrease at this end (sl st across 3 dc into ch-3 space, then work inward).
2. On the Length Edge (Still growing): Work an increase at this end (ch 6, dc in 4th, 5th, 6th ch).
During this stage, your total tile count per row remains completely constant (48 tiles every single row) until the length edge reaches 64 tiles. At that point, you decrease on both ends until the blanket closes.
Clean Color Changes & The Bobbin Untangling Rule
Whether you are creating wide modern diagonal stripes or intricate pixel graphgans, changing colors at the incorrect point will leave messy, visible blips across the surface of your tiles.
- The Seamless Color Join: Always introduce the new color at the final step of the anchor slip stitch. Complete the last double crochet of Tile 1, insert hook into the ch-3 space of the neighbor tile, yarn over with the new color, and pull through to complete the slip stitch. Then chain 3 in the new color. The color boundary stays crisp and hidden inside the joint.
- The Clockwise / Counter-Clockwise Turning Rule: If you are working with multiple yarn bobbins or skeins, turning your blanket in the same direction every row will quickly twist your yarn into an unmanageable bird’s nest. To prevent tangling: turn your work clockwise at the end of odd rows, and turn your work counter-clockwise at the end of even rows. This automatically cancels out the twists.
- Invisibly Weaving Ends: Thread your tail onto a tapestry needle and weave it vertically through the interior center of the 3 double crochet posts. Make a sharp 180-degree turn around a single fiber strand, and weave back through the base of the slip stitch. This locks the tail against friction and washing machine cycles without distorting tile corners.
Leveling the Sawtooth Edge & Adding Tailored Borders
Raw corner-to-corner blankets have a distinctive “sawtooth” jagged staircase perimeter where the tops and sides of the blocks meet. Before attaching any decorative border, you must establish an even foundation framing round:
The Foundation Border Leveling Round:
Join yarn with a standing single crochet (sc) in any corner space. Work (sc, ch 2, sc) in the corner. Across each side edge: *ch 2, work 1 sc into the recessed valley between two tiles, ch 2, work 1 sc into the top of the next tile*. Repeat this sequence evenly around the entire blanket, working (sc, ch 2, sc) in each of the 4 outer corners. Slip stitch to the beginning sc to close. This establishes a perfectly straight, square border foundation.
- Border Option A: Modern Linen / Moss Stitch (Clean Minimalist Frame): Work 3 to 5 rounds of alternating
(sc in ch-2 space, ch 1, skip sc)around the foundation frame, working(sc, ch 2, sc)in each corner. This creates a tailored, woven edge that lays completely flat. - Border Option B: Chunky Post-Stitch Ribbing (Cozy Knit Look): Work 1 round of solid half double crochet (hdc) into every stitch and chain space, followed by 3 rounds of alternating front-post and back-post double crochets (FPDC / BPDC) for a plush, sweater-knit border.
Blocking & Care for Long-Lasting Heirlooms

- Steam Blocking for Square Corners: Pin your blanket out on interlocking foam blocking tiles, checking each corner with an L-square ruler to ensure true 90-degree right angles. Hover a handheld garment steamer 1.5 to 2 inches above the stitches, allowing the steam to relax the fibers. Never touch the hot metal iron plate directly to acrylic or wool stitches, as high heat will permanently flatten the texture.
- Washing & Drying Instructions: Machine wash cold on the gentle cycle inside a large zippered mesh laundry bag with mild detergent. Tumble dry on low heat or lay flat on dry bath towels. Proper laundering softens the fibers and blends the tile transitions seamlessly.
Save This Free Tutorial to Pinterest
Pin your favorite reference cards below to your Crochet Blankets or Crochet Patterns board on Pinterest so you always have this C2C diagonal tile sizing matrix, decrease mechanics, and border guide on hand for your next blanket project!


Frequently Asked Questions & Troubleshooting
Why are there large holes or loose gaps between my C2C tiles?
Gaps usually occur when the slip stitch anchor into the ch-3 space is worked too loosely or when the initial climbing chains are too slack. Keep your slip stitch snug against the corner of the tile and maintain firm tension on the initial climbing chains. If gaps persist, try the Ch-2 Modification: work Ch 2 + 3 dc instead of Ch 3 + 3 dc, and chain 5 instead of 6 for increase rows. This produces a tighter, denser fabric with virtually zero daylight between tiles.
How do I count my diagonal rows without getting confused?
Because C2C grows diagonally, count the tiles along either straight outer edge rather than trying to count diagonally across the middle. The number of tiles along your straight bottom edge corresponds exactly to the number of completed rows.
How do I fix a missed tile discovered several rows back?
Because C2C is built on interlocking diagonal chain spaces, a missing tile disrupts every subsequent row in that diagonal column. While it is tempting to improvise a patch, the cleanest solution is to frog back to the error. Fortunately, unhooking diagonal rows is extremely fast and preserves the mathematical integrity of the edge.
Is C2C yarn hungry compared to standard crochet rows?
C2C consumes approximately 10% to 15% more yardage than flat rows of standard double crochet because of the extra turning chains and slip stitch anchors. However, it produces a substantially squishier, warmer, and more durable fabric that holds its shape over years of heavy use.
Have you started your corner to corner blanket? Document your color palette on Ravelry or save this tutorial to your Pinterest crochet boards!