

Suspending a potted houseplant in a handcrafted cord holder brings living greenery to eye level while freeing up window sills and table surfaces. While knot-intensive macramé requires complex rope cutting formulas, this modern crochet hanging planter uses thick 4mm unbleached cotton cord and open chain-space arches to build a balanced 4-arm suspension system and expanding diamond basket that cradles common flower pots with symmetrical tension.
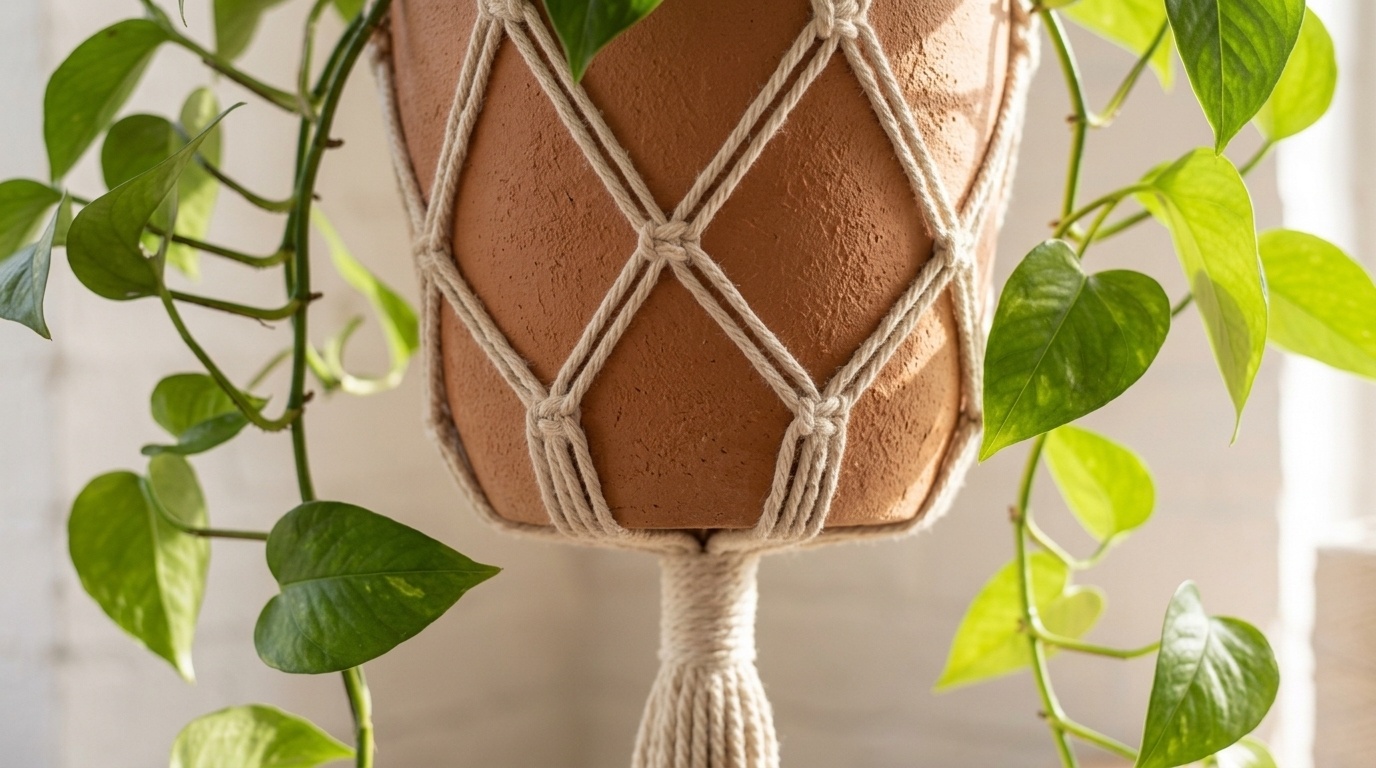
Unlike delicate garments where supple drape is the primary goal, functional suspended home items demand structural integrity and minimal vertical sag. Drawing from the low-stretch qualities of raw plant fibers—similar to the sturdy unmercerized cotton explored in our dense kitchen cotton washcloth guide—this pattern relies on dense single crochets enclosing a solid hardwood ring and counted chain spans that keep the planter hanging level under daily use.
Pattern Note: All instructions and stitch abbreviations throughout this guide are written using standard US crochet terminology (US terms). Across all sections, the turning chain does not count as a stitch throughout.
How This 4-Arm Plant Hanger Is Built
Before picking up your hook, understand the structural path of this project. The hanger is worked in four connected phases from the top hanging point downward to the tassel fringe:
[ TOP BIRCH WOOD RING (6.5 cm) ]
|
[ 24 Single Crochets Enclosing Ring ]
|
+————-+————+————-+
| | | |
[Arm A1] [Arm A2] [Arm A3] [Arm A4] (4 Equal Suspension Straps)
(Stitch 1) (Stitch 7) (Stitch 13) (Stitch 19)
| | | |
+————-+————+————-+
|
[ Upper Basket Junctions (Round 1) ]
|
Round 1: 4 Primary Diamond Arches (ch-8)
|
Round 2: 4 Staggered Diamond Arches (ch-7)
|
Round 3: 4 Base Contraction Arches (ch-5)
|
[ Base Drawstring Cinch & Pot Shelf ]
|
[ Gathered Wrap Knot (18 Tail Ends) ]
|
[ 15 cm Combed Boho Fringe Tassel ]
Throughout these instructions, the four vertical arms are identified as A1, A2, A3, and A4. Keeping these labels consistent ensures your strap drops and basket arches maintain 4-way radial symmetry.
Measure Your Pot Before Crocheting
Plant pots vary widely in vertical taper, rim flare, and base proportion. Rather than relying on labeled pot diameters, measure your actual empty container with a flexible sewing tape before starting:
- Dimension A (Top Rim Outer Circumference): Wrap your tape around the widest top lip. (Reference sample pot: 47 cm / 18.5 in; approx. 15 cm / 6 in diameter).
- Dimension B (Widest Body Circumference): For tapered pots, this is usually at the top rim; for rounded bulb pots, measure around the widest middle point.
- Dimension C (Base Outer Diameter): Measure straight across the flat bottom of the pot. (Reference sample pot: 10 cm / 4 in base).
- Dimension D (Vertical Wall Height): Measure from the flat bottom straight up the outside wall to the top rim. (Reference sample pot: 13 cm / 5.25 in).
Keep these four measurements handy. You will use them during the empty-pot test fit before securing the final base cinch.
Reference Cord, Ring & Hook Specifications

Swipe left or right to see all columns.
| Component | Reference Dimension | Alternative Notes |
|---|---|---|
| Cord Type | 4 mm single-twist cotton macramé cord | Combs out beautifully into soft fringe |
| Crochet Hook | 6.00 mm (US J/10) polished wood | Check our yarn weight and hook size chart for metric gauge equivalents |
| Hanging Ring | 6.5 cm (2.5 in) birch hardwood ring | Welded brass craft rings (5–7 cm) also work |
| Arm Length | 45 cm (18 in) flat un-stretched | Customizable via chain gauge math |
| Total Length | 85 cm to 95 cm (33 to 37 in) | From top of ring to fringe tip |
| Cord Estimate | 65 to 75 meters (~260 grams) | Includes 8 fringe strands & wrap knot |
Yarn / Cord Substitution Rules: If you substitute another fiber or cord thickness (such as 3mm braided cord, jute, or holding two strands of #4 worsted cotton together), do not assume identical counts will produce the same dimensions. Different cord constructions vary in density, stretch, and stiffness. Make a chain gauge sample first, measure your chains per centimeter, test-fit your empty pot, and recalculate both arm and arch chain counts accordingly.
Cover the Ring & Mark Four Equal Anchor Points
The top wooden ring serves as the primary hanging anchor. Working tight single crochet stitches around the ring encloses the wood in a protective fiber sleeve:
- Ring Enclosure: Make a slip knot with a 15 cm tail on your 6.0 mm hook. Insert hook directly through the center opening of the 6.5 cm birch ring, catch the working cord, and draw up a loop to the outer edge of the ring (2 loops on hook). Yarn over and pull through both loops to complete 1 single crochet around the ring core.
- Complete Ring Stitches: Repeat until you have worked exactly 24 single crochets evenly around the ring. Join with a slip stitch into the top of the very first single crochet. [24 active sc enclosing ring].
- Quadrant Math: Divide the 24 stitches by 4 arms to establish 4 equal quadrants of 6 stitches:
RING_STITCH_COUNT = 24 | ARM_COUNT = 4 | STITCHES_PER_QUADRANT = 6 - Marker Placement: Place locking stitch markers into the 4 anchor points:
- Arm A1: Stitch 1 (the joined stitch)
- Arm A2: Stitch 7 (skip 5 unworked stitches between A1 and A2)
- Arm A3: Stitch 13 (skip 5 unworked stitches between A2 and A3)
- Arm A4: Stitch 19 (skip 5 unworked stitches between A3 and A4)
Rule for Substitute Rings: If using a smaller or larger ring, work enough single crochets to cover the wood without crowding or puckering. The total stitch count must be divisible by 4 so that your four suspension arms remain spaced exactly 90 degrees apart.
Suspension Arms Construction Steps
To construct and attach the arms to the ring, join the straps directly into each marked quadrant anchor on the wood ring:
Do not use an arbitrary chain count for your suspension arms. Suspension length controls how far below the ceiling hook your plant will sit, while steady hand tension prevents one arm from sagging lower than the others—see our guide on how to control crochet tension and hook grip for tips on keeping long chain sequences uniform.
Step 1: Determine Your Target Arm Length
Measure from your desired ceiling hanging position down to where the top rim of your pot should rest. Subtract approximately 10 cm for the wooden ring and top hardware. In this reference pattern, the target un-stretched arm length is 45 cm (18 inches).
Step 2: Measure Your Chain Gauge
With your 6.0 mm hook and 4mm cord, chain 20 loosely. Lay the chain flat along a ruler without pulling or stretching. Measure the length across the center 15 chains:
measured chains per cm = 15 chains ÷ measured length in cm
(Reference gauge estimate: approx. 1.0 chain per cm / 2.54 chains per inch).
Step 3: Calculate Your Required Chains
required chains = target arm length (cm) × measured chains per cm
Example calculation: 45 cm × 1.0 chain/cm = 45 chains. (Round to the nearest whole chain count).

Step 4: Executable Strap Instructions (Fastened Off with Rejoining)
To avoid confusion with dangling live loops, work and fasten off each arm independently:
- Arm A1: Join cord with a slip stitch in marked stitch 1 of the ring. Work 45 chains evenly. Cut cord leaving a 10 cm (4-inch) tail, pull the tail through the final loop to fasten off, and secure the end with a locking marker labeled A1. [Arm A1: 45 ch].
- Arm A2: Join cord with a slip stitch in marked stitch 7. Work exactly 45 chains. Fasten off with a 10 cm tail, and label with marker A2. [Arm A2: 45 ch].
- Arm A3: Join cord with a slip stitch in marked stitch 13. Work exactly 45 chains. Fasten off with a 10 cm tail, and label with marker A3. [Arm A3: 45 ch].
- Arm A4: Join cord with a slip stitch in marked stitch 19. Work exactly 45 chains. Fasten off with a 10 cm tail, and label with marker A4. [Arm A4: 45 ch].
Symmetry Check: Lay all four chains side by side flat on your table without pulling. Smooth them with your palms. All four chains must measure equal length unstretched.
Build the Diamond Basket (Rounds 1 to 3)
The four arms are now joined in the round to form an interlocking diamond mesh basket that cups the pot body. Unlike the dense, closed texture of our textured waffle stitch tutorial, this open trellis structure flexes dynamically around curved pot surfaces:
Round 1: Arm Coupling & Primary Diamond Arches
Anchor Convention: Working into the 45th chain of each strap connects the arms into a continuous ring.
- Take Arm A1. Join working cord with a slip stitch directly into the 45th chain of Arm A1. Chain 1, work 1 single crochet in that same 45th chain.
- Chain 8 loosely. Pick up Arm A2 (ensure the chain is not twisted). Work 1 single crochet in the 45th chain of Arm A2.
- Chain 8 loosely. Pick up Arm A3 (untwisted). Work 1 single crochet in the 45th chain of Arm A3.
- Chain 8 loosely. Pick up Arm A4 (untwisted). Work 1 single crochet in the 45th chain of Arm A4.
- Chain 8 loosely. Join with a slip stitch into the starting single crochet at Arm A1.
Round 1 Audit: 4 single crochets (at junctions A1, A2, A3, A4) + 4 arches of ch-8 = 4 primary diamond arches. R1_ARCH_COUNT = 4.
Round 2: Staggered Diamond Arches
Center Anchor Convention: Because an 8-chain arch has an even number of chains and no single center chain, work your anchor stitch directly into the ch-8 space (the open arch loop). This allows the single crochet to slide and self-center at the natural apex under tension.
- To advance to the first arch apex, slip stitch loosely through the first 4 chains of the first ch-8 arch.
- *Chain 7 loosely. Work 1 single crochet directly into the next ch-8 space*.
- Repeat from * to * around all 4 arches.
- To close the round: after the 4th ch-7 arch, join with a slip stitch into the base of the first slip stitch.
Round 2 Audit: 4 staggered diamond arches. R2_ARCH_COUNT = 4. These arches shift 45 degrees, creating the classic interlocking diamond mesh pattern.
Round 3: Base Contraction Arches
Center Anchor Convention: A 7-chain arch has an odd number of chains with an exact center at chain 4 (3 chains on each side). Work your single crochet into the 4th chain of each arch (or into the open ch-7 space).
- Slip stitch loosely through the first 3 chains of the first ch-7 arch to reach chain 4.
- *Chain 5. Work 1 single crochet into the 4th chain (center) of the next ch-7 arch*.
- Repeat from * to * around all 4 arches.
- To close the round: after the 4th ch-5 arch, join with a slip stitch to the starting slip-stitch base.
- Cut working cord leaving a 15 cm tail, and pull through to fasten off. Weave this tail securely into the adjacent stitches.
Round 3 Audit: 4 contracted base arches. R3_ARCH_COUNT = 4. The shorter 5-chain arches draw the fabric inward, forming a secure shelf beneath the pot.
Test-Fit the Empty Pot Before Final Cinching
Before cutting fringe or knotting the base permanently, place your EMPTY planter pot inside the crocheted basket to test the fit:
- Rim Clearance Check: The upper junction single crochets of Round 1 should sit approximately 2 to 4 cm (1 to 1.5 inches) below the top pot rim. If the upper arches sit above the rim, the basket is too deep; if they sit halfway down the pot, the basket is too shallow.
- Base Retention Check: The 4 contracted arches of Round 3 should cup inward around the lower curve of the pot base. The pot must not be able to slip through the bottom opening when gently lifted.
- Vertical Strap Alignment: Hold the top birch ring up. All four arms (A1, A2, A3, A4) should rise vertically along the four sides of the pot with equal tension. If one arm appears slack while the opposite arm pulls taut, check that all four arms were worked with identical chain counts.
Cinch the Base & Add the Combed Fringe
With the empty pot verified in the basket, complete the base closure and decorative tassel fringe:

Audited Fringe Strand Math
To avoid confusing strand counts, here is the exact inventory of cords in the tassel bundle:
- Cinch Strand: 1 separate strand of cord (approx. 50 cm / 20 in). Threaded through the 4 contracted arches of Round 3 and pulled tight like a drawstring = 2 cinch tail ends.
- Decorative Fringe Strands: Exactly 8 cut strands of 4mm cotton cord, each cut to 40 cm (16 inches). Folded in half through the base loops = 16 decorative hanging ends.
- Total Bundle Ends: 16 decorative ends + 2 cinch tail ends = 18 visible ends in the tail bundle before wrapping.
- Target Finished Fringe Length: 15 cm (6 inches) trimmed length from wrap knot to fringe tips.
Execution Steps:
- Base Drawstring Cinch: Thread your 50 cm cinch strand onto a tapestry needle. Pass the needle through the center of all 4 contracted arches of Round 3. Pull the cord tight until the base of the basket closes snugly beneath the pot. Tie a firm square knot; leave the two tails hanging downward.
- Insert Decorative Fringe Strands: Take your 8 cut 40 cm strands. Fold them in half to form a loop. Use your crochet hook to pull the folded loop through one of the base arch spaces, then draw the strand ends through the loop (lark’s head knot). Distribute the 8 folded strands evenly around the 4 base arches.
- The Gathered Wrap Knot: Cut a separate 75 cm (30-inch) piece of cord. Form a downward-pointing U-loop alongside the 18-strand bundle. Wrap the long working end tightly around all strands 8 to 10 times, moving downward. Pass the wrapping tail through the bottom U-loop, then pull the top standing tail firmly upward until the knot is pulled halfway underneath the wraps. Trim both wrapping tails flush so the knot remains locked and hidden inside.
- Trimming & Combing: Lay the tassel flat on your table. Cut straight across at 15 cm (6 inches) with sharp fabric shears. Using a fine-toothed comb, gently brush through the single-twist cord plies from bottom to top until the fringe is soft and fluffy. For smoothing curled cord, reference our blocking and edge-finishing techniques on steam relaxation.
Hanging & Home Safety Precautions
A hanging planter carries continuous dead weight. Practice prudent home safety:
- Hardware Selection: Use ceiling hooks and mounting hardware specifically rated by their manufacturer for the surface material (solid timber joist, concrete ceiling, or hollow ceiling toggle) and for the total anticipated weight.
- Account for Wet Soil Weight: Potting soil absorbs substantial water during irrigation. A pot that feels light when dry can double or triple in weight immediately after watering. Always calculate total loaded weight based on a fully watered pot.
- The Sink-Watering Rule: Take the pot down from the hanger to water over a kitchen sink or bathtub. Allow excess drainage water to flow out completely for 15 to 20 minutes before replacing the pot in the cotton hanger. Trapped standing moisture against cotton fibers causes mildew and fiber degradation.
- Safe Placement: Do not suspend handmade fiber plant holders directly above beds, seating areas, cribs, high-traffic walkways, or delicate electronics.
- Periodic Inspection: Inspect the wooden ring, hanging chains, and base knot every few months for signs of cord fraying, fiber thinning, or ceiling hook loosening.
Frequently Asked Questions
Can I wash this plant hanger in a washing machine?
No. Machine washing with spinning agitation will tangle the combed fringe into an unrecoverable mat and may crack the wooden ring. If cleaning is needed, hand-wash gently in cool water with mild soap, rinse without twisting, lay flat to dry, and re-comb the fringe.
Can I use a metal ring instead of a wooden ring?
Yes. A welded brass or stainless steel craft ring of 5 to 7 cm diameter works well. Ensure the ring has smooth, burr-free surfaces so metal edges do not abrade the cotton cord under tension.
How do I prevent the fringe from shedding fibers when combed?
Single-twist cord consists of parallel cotton fibers that fluff easily. Comb gently starting at the bottom tips and work gradually upward toward the gathered wrap knot to minimize fiber loss.
Save This Plant Hanger Pattern to Pinterest
Pin these high-resolution reference guides to your favorite Pinterest crochet boards so you always have the 4-arm suspension math, diamond basket rounds, and pot measurement matrix ready when making your next hanging planter!

