

There is a distinct, tactile pleasure in pulling on a pair of thick, handmade winter mittens on a frosty sub-zero morning. Unlike thin commercial gloves where cold air penetrates every woven seam, dense crochet stitches trap pockets of insulating warm air against your skin. This free crochet mittens pattern combines the speed of super bulky weight yarn with an architectural, faux-knit ribbed stitch that delivers maximum thermal loft, ergonomic wrist hugging, and irresistible striped color play without requiring tedious color changes.
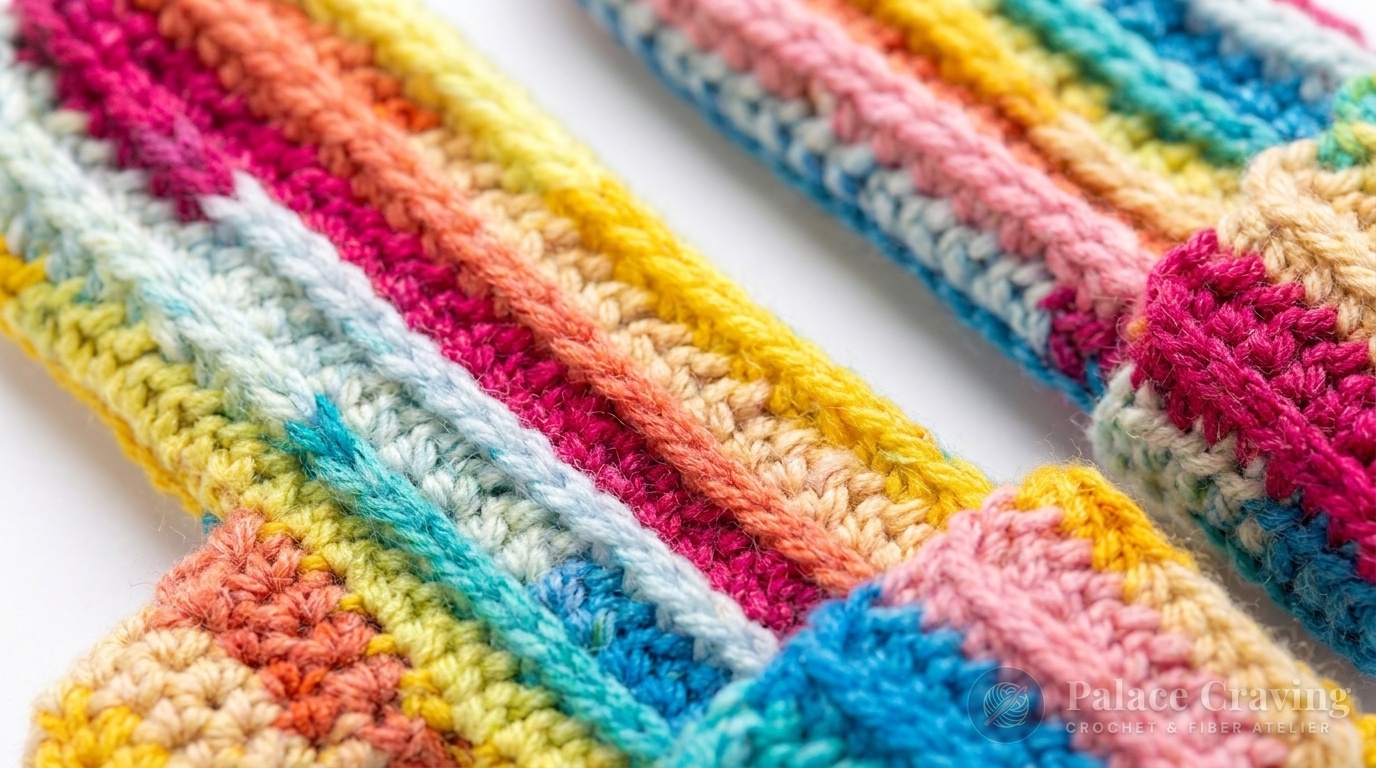
Traditional mitten construction often intimidates newer makers with complex thumb gusset increases, fiddly stitch counts worked in tight rounds, and bulky fingertip seams that feel awkward inside your palms. In our studio, we engineered this design around an ingenious flat-rectangle geometry with integrated row-end shaping. By working sideways in alternating ridges of half double crochet through the third loop, you create continuous vertical stretch that contours naturally around the palm, complete with an effortless afterthought thumb slit and an inverted seam that keeps your folded cuff 100% reversible.
Why You’ll Love Crocheting These Winter Mittens
- Weekend Friendly Speed: Stitched with super bulky weight #6 yarn and a 6.5mm hook, a single mitten works up in just 1.5 to 2 hours of relaxed evening stitching.
- Faux-Knit Camel Stitch Texture: By inserting your hook into the horizontal bar below the top loops, stitches tilt forward to produce crisp, raised columns reminiscent of classic fisherman knitwear.
- Zero Complex Gusset Math: The thumb opening is created naturally by leaving a precise 5-stitch gap during side seaming—eliminating awkward increases and circular joins entirely.
- Reversible Dual-Layer Folded Cuff: The cuff features an inverted whipstitch seam, allowing you to fold it up for double-thickness wrist warmth without exposing raw seam edges.
Sizing, Fit & Stitch Architecture
This pattern is graded as a versatile Adult Palm fit. Because the third-loop stitch produces an elastic ribbing that expands across the width of the hand, the fabric comfortably accommodates palm circumferences between 7.5 and 8.5 inches.
Curated Materials & Tested Studio Toolkit

- Yarn Selection: 1 cake (approx. 239 yards / 218 meters, 250g) of Super Bulky #6 striping cake yarn. The self-striping color changes create distinct vibrant bands of magenta, golden yellow, turquoise, and peach without weaving in dozens of ends. For understanding yarn weights and fibers, consult our comprehensive Crochet Yarn Weight & Hook Size Guide.
- Crochet Hook: Size U.S. K/10½ (6.5 mm) ergonomic aluminum or bamboo hook. Maintaining even yarn feed is essential when working with bulky plies; review our masterclass on how to hold a crochet hook and control yarn tension for hand comfort.
- Notions: Steel tapestry yarn needle for seaming and cinching, sharp craft snips, locking stitch markers, and a flexible tape measure.
Tested Studio Recommendations
Curated Tools for Flawless Mittens
6.5mm Ergonomic Hook (US K/10.5)
Deep ergonomic rubber grip prevents wrist fatigue on thick bulky yarns.
Large-Eye Blunt Tapestry Needles
Smooth steel eye accommodates thick bulky plies without splitting strands.
Locking Stitch Markers (120 Pcs)
Indispensable for marking the exact 5-stitch thumb gap during seaming.
Vintage Gold Stork Craft Snips
Ultra-sharp blades deliver clean, blunt yarn cuts for invisible top cinching.
Disclosure: As an Amazon Associate, Palace Craving earns from qualifying purchases at zero added cost to you. We only recommend studio-tested essentials.
Stitch Anatomy & Master Techniques
To produce the faux-knit vertical ribbing, you will master working into the horizontal bar of half double crochet stitches (often referred to as the third loop or camel stitch). When a half double crochet is created, it has three loops: the standard front and back loops on top, and a third horizontal bar loop that rests diagonally beneath the top loops on the back side (facing you on the return pass).
- Half Double Crochet in Horizontal Bar (hdchb): Yarn over, insert your hook into the horizontal bar directly below the space normally worked. Yarn over and pull up a loop (3 loops on hook), yarn over and pull through all 3 loops. This forces the top two loops forward, creating a raised knit-look braid.
- Single Crochet in Front Loop Only (scfl): Insert hook solely into the front loop of the stitch. This builds a flexible, lower-profile transition near the cuff and fingertip edges.
- Gauge Requirement: 11 single crochets and 12 rows = 4 inches (10 cm). Always take time to measure your gauge swatch; slight tension shifts will alter the hand circumference.
Step-by-Step Mitten Construction Walkthrough
Work two identical mitten panels flat. Each piece begins with a foundation chain that forms the complete lengthwise span from cuff to fingertip.
Foundation Chain: Ch 43 loosely using your 6.5mm hook.
Row 1 (Wrong Side): Slip stitch in the 2nd ch from hook. Work 1 sc in each of the next 3 ch. Work 1 hdc in each remaining ch across to the end of the chain. Turn. (42 total stitches: 1 sl st, 3 sc, 38 hdc).
Row 2 (Right Side): Ch 2 (does not count as a stitch). Work 1 hdchb in each stitch across to the last 4 sts. Work 1 scfl in each of the next 3 sts. Slip stitch in the front loop only of the last st. Turn.

Row 3: Ch 1. Slip stitch in the front loop only of the first st. Work 1 scfl in each of the next 3 sts. Work 1 hdchb in each stitch across to the end of the row. Turn.
Rows 4 – 24 (Ribbed Progression): Repeat Rows 2 and 3 in sequence until your flat piece measures approximately 8.5 inches (21.5 cm) across from the foundation edge, ending on a Row 2 repeat. Fasten off, leaving a generous 20-inch tail for seaming.
Folding, Seaming & The Afterthought Thumb
Now transform your flat ribbed rectangle into a 3D ergonomic mitten. Lay your piece flat with the Right Side facing up.
- Fold Mitten: Fold the rectangle in half lengthwise with Right Sides together. Align the stitch rows carefully along the long side seam.
- Seam Upper Hand: Starting at the top shaped edge and working downward through both thicknesses, whipstitch the first 16 stitches together. Secure with a firm knot and fasten off.
- Thumb Gap: Skip the next 5 stitches completely unworked. This 5-stitch opening (approximately 2.25 inches) creates a comfortable, natural thumb exit that flexes freely with hand movement.
- Inverted Cuff Seam: To ensure the folded cuff looks flawless without an exposed raw seam, flip the remaining unworked cuff portion so the Wrong Sides are together. Whipstitch the remaining 21 stitches together to the bottom hem. Fasten off and weave in all yarn tails.
- Cinch the Fingertip Crown: Thread a 12-inch length of matching yarn onto your tapestry needle. Weave the needle in and out through each row-end stitch along the very top edge of the mitten. Pull the yarn tail firmly to cinch the circle tightly closed like a drawstring bag. Pass the needle through the center of the cinch to the interior, knot securely, and trim.
3 Atelier Secrets for Flawless Winter Mittens
1. Maintain Loose Turning Chains: Because super bulky yarn carries heavy gauge, tight turning chains will cause the fingertip edge to bow inward unevenly. Work your Ch 2 loosely or step up to a 7.0mm hook strictly for turning chains to keep the side edges parallel.
2. Reinforce the Thumb Stress Corners: When whipstitching down to the 5-stitch thumb gap, take an extra figure-eight anchoring stitch into the top and bottom junction corners. This prevents unraveling when pulling your mittens on and off repeatedly throughout winter.
3. Gentle Steam Block Before Assembly: Before seaming the side and cinching the crown, lightly steam your flat rectangle on blocking mats. Avoid resting the iron directly on acrylic yarn plies; use steam hovering to relax the ribbed columns. For detailed step-by-step blocking guidance, explore how to block crochet and finish edges.
Styling & What to Pair With Your Mittens

These colorful chunky mittens infuse playful energy into cold-weather wardrobes. Balance their vibrant striped palette with neutral winter essentials:
- Cozy Neckwear: Pair them with our chunky Modern Crochet Ribbed Infinity Scarf worked in coordinating oatmeal or cream to anchor the bright shades.
- Matching Headwear: Complement the vertical ridge architecture by stitching our matching Modern Crochet Ribbed Beanie for a complete handmade gift set.
- Outerwear: Wear over classic camel wool trench coats, oversized charcoal puffer jackets, or rustic corduroy coats.
Care, Washing & Longevity
- Hand Washing: Submerge your mittens in cool water mixed with a drop of gentle wool-safe wash. Never wring or twist bulky ribbed stitches.
- Drying: Press out excess water between clean bath towels and lay flat to dry in their natural mitten shape. Allow 24 hours of airflow.
- Pill Prevention: Bulky acrylic-wool yarns naturally develop slight surface fuzz over time. Keep them crisp with a light fabric comb once per season.
Frequently Asked Questions
Can I adjust this pattern for smaller hands or children?
Yes. To reduce the length, decrease the foundation chain by multiples of 2 stitches (each 2-chain reduction removes approximately 0.65 inches of mitten length). To adjust hand width, work fewer total rows (stop at 7.0 or 7.5 inches wide before seaming).
Why are my mittens curling while working the flat rectangle?
Because the camel stitch pushes top loops forward, the fabric has natural directional tension that causes temporary curling during the first 6 to 8 rows. Once you reach row 12 and the opposing ribs balance out, the piece flattens out smoothly.
Can I substitute worsted weight yarn?
Yes, but you will need to hold two strands of worsted weight yarn together simultaneously to match the gauge and bulk of a single super bulky #6 ply.
How do I add a thumb sleeve if I want full finger coverage?
If you prefer a thumb tube rather than a simple slit, join yarn with a slip stitch around the perimeter of the 5-stitch opening, pick up 12 sc in the round, work 6 rounds of sc, and cinch the top closed.
Pin This Free Crochet Pattern
Save these colorful chunky winter mittens to your Pinterest crochet boards so you have the stitch counts and seaming guide ready whenever cold weather strikes!

