

There is an enduring winter elegance in adorning your Christmas tree with delicate, handmade lace ornaments. When glowing holiday lights filter through pure white yarn stitches, each crystalline motif sparkles with the warmth of thoughtful maker heritage. This free crochet snowflake ornament pattern works up in just four rapid, accessible rounds—yielding a crisp 5-inch six-pointed heirloom star that transforms ordinary pine boughs, holiday window panes, and wrapped gift packages into artisan winter wonderlands.
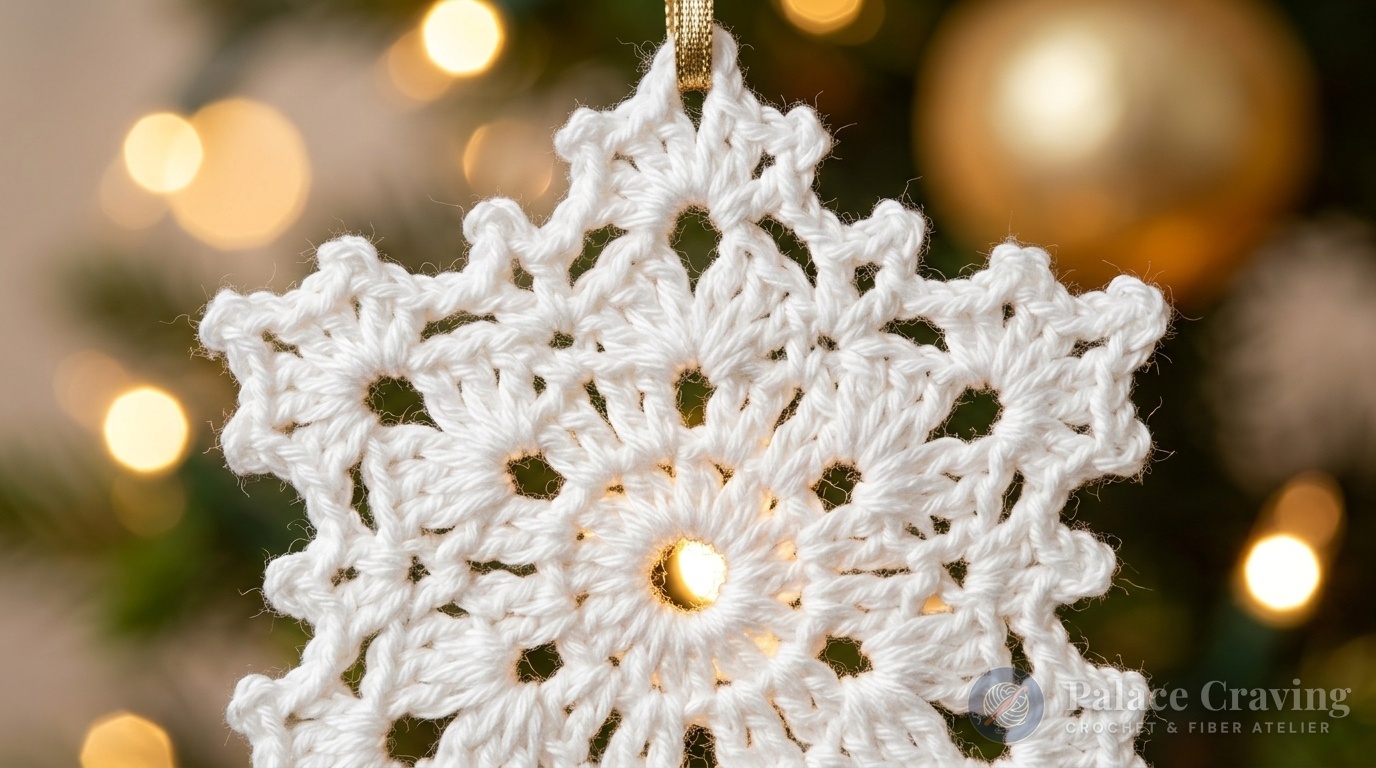
Lace crochet patterns often intimidate makers with fears of thread-weight micro hooks, slippery tensions, or limp finished pieces that curl into misshapen ruffles. In our studio, we adapted this architectural design to utilize standard worsted or sport-weight cotton-acrylic yarn paired with a comfortable 3.75mm (US F-5) hook. Combined with our time-tested fabric stiffening formula, your finished snowflakes will hold razor-sharp, crystal-firm points for decades of holiday decorating alongside our festive Crochet Pinstripe Christmas Tree Skirt and Crochet Christmas Stocking.
Why You’ll Love Crocheting These Snowflake Ornaments
- Instant Gratification Speed: Consisting of just four short rounds, each complete snowflake takes only 15 to 20 minutes from foundational ring to final fasten-off.
- Flawless 6-Point Radial Symmetry: Engineered around a foundational 12-stitch base, the geometry expands seamlessly into six balanced lace points without warping or curling edges.
- Scrap-Buster Friendly: A single 50g skein of pure white cotton or acrylic yields over 10 to 12 full-sized snowflake ornaments.
- Versatile Seasonal Styling: Hang them as tree baubles, tie them into festive garland bunting, suspend them from curtain rods, or affix them to Christmas gift boxes as reusable handmade tags.
- Beginner-Accessible Stitches: Built entirely on standard foundational stitches: chain, slip stitch, single crochet, and double crochet, crowned by simple picot loops.
Lace Geometry, Dimensions & Stitch Count Blueprint
Precision stitch placement is essential for achieving crystalline symmetry. Verify your stitch math against this round-by-round reference table:
Key Materials & Studio Swaps

- Pure White Worsted or DK Yarn: Approx. 25–30 yds per snowflake. 100% mercerized cotton gives the crispest stitch definition, but premium acrylic works wonderfully when wet-blocked. (Consult our Yarn Weight Guide for ply substitutions).
- Size U.S. F-5 (3.75 mm) Crochet Hook: Provides firm, tight gauge to ensure lace loops stay crisp rather than floppy.
- Rust-Proof Stainless Steel T-Pins: Absolutely vital for pinning out the picot points during blocking without leaving rust stains on pure white fibers.
- Dense Foam Blocking Mat: Provides a sturdy grid foundation to measure uniform 6-point radial symmetry.
- Finishing Notions: Thin metallic gold or silver satin hanging ribbon (approx. 8 inches per ornament), tapestry needle, and fabric stiffener.
Tested Tools for Flawless Lace Blocking
Lace ornaments achieve their crisp crystalline beauty during blocking. We recommend these trusted atelier notions:
KnitIQ Blocking Mats & T-Pin Grid Set
Dense interlocking foam with precision alignment grids and stainless rust-proof pins.
Aleene’s Stiffen Quik Fabric Spray (8 oz)
Dries completely transparent and rock-hard without yellowing delicate white fibers.
Disclosure: Palace Craving atelier participates in select affiliate programs. When purchasing through our links, we may earn an editorial commission at zero additional cost to you.
Step-by-Step Stitch Walkthrough
Stitch Abbreviations & Terms:
• Ch: Chain
• Sc: Single Crochet
• Hdc: Half Double Crochet
• Dc: Double Crochet
• Sl st: Slip Stitch
• Sp: Space
• [ ]: Repeat bracket instructions the specified number of times.
The Foundation Eyelet
Using your 3.75mm hook and white yarn, chain 6. Insert your hook into the first chain and slip stitch to form a neat ring. Keep your tail held along the ring to crochet over it, sealing the center neatly.
Round 1: The Core Spokes
Ch 1 (does not count as a stitch). Work 12 single crochet directly into the center ring. Join with a slip stitch into the top of the very first single crochet. (12 sc total). Pull the starting yarn tail firmly to cinch the center ring into a uniform circle.
Round 2: The Lattice Loops
Ch 1, work 1 sc in first stitch. *Ch 3, 1 sc in next sc.* Repeat from * around 11 times. To create the 12th loop without losing your working hook position at the top of the arch: work 1 half double crochet directly into the first sc to join. (12 distinct ch-3 spaces formed).

Round 3: The Radial Shell Arms
Ch 1, 1 sc over the joining hdc post. *(2 dc, ch 3, 2 dc) directly into the next ch-3 loop space, 1 sc in the following ch-3 loop space.* Repeat from * around 5 more times, omitting the final sc on the last repeat. Join with a slip stitch into the first sc. You will now clearly see six balanced double-crochet shell arms branching outward from the center.
Round 4: The Crystalline Picot Crown
This final round sculpts the sharp crystalline tips:
Ch 4, slip stitch into the exact same single crochet as joining (creates the outer valley spur). *Ch 2, work into the center ch-3 space of the shell arm: (1 sc, ch 3, 1 sc, ch 5, 1 sc, ch 3, 1 sc) [this forms the magnificent triple-picot trident crown!]. Ch 2, skip the 2 dc, work (slip stitch, ch 4, slip stitch) into the next single crochet.* Repeat from * around all 6 arms, ending the last repeat with ch 2. Join with a slip stitch into the very first slip stitch of the round. Fasten off, leaving a 4-inch tail.

The Studio Stiffening & Blocking Masterclass
Unblocked crochet snowflakes are floppy and curled. Blocking is the transformative step that turns soft yarn into rigid, glass-like crystal ornaments. Follow this foolproof 3-step studio protocol:
1. Prepare the Stiffening Solution:
• Method A (Commercial Fabric Stiffener): Spray generously with Aleene’s Stiffen Quik until fibers are thoroughly damp.
• Method B (PVA Glue Formula – Atelier Favorite): Mix 2 parts clear craft PVA glue with 1 part warm water until completely smooth.
• Method C (Traditional Cornstarch Bath): Dissolve 2 tablespoons cornstarch in 1 cup of boiling water until glossy and translucent. Allow to cool.
2. Precision Pinning: Submerge your snowflake in the solution for 60 seconds, squeeze out excess liquid gently in a towel (never twist or wring!). Place onto your foam grid mat. Insert a rust-proof T-pin through the center eyelet, then pin the top central ch-5 loop of each of the 6 arms, stretching outwards evenly to exactly 5.0 inches in diameter. Pin the smaller ch-3 side picots and valley loops.
3. Curing & Hanging Ribbon: Allow to dry flat for 18–24 hours in a warm room. Once completely stiff and dry, unpin carefully. Cut an 8-inch length of thin metallic gold ribbon, loop through one of the top ch-5 picot points, and tie in an elegant knot. (For in-depth advice on blocking tools, review our definitive guide on How to Block Crochet & Finish Edges).
Explore More Festive Crochet Patterns
Continue decorating your cozy home with these beloved holiday tutorials from Palace Craving:
- Crochet Pinstripe Christmas Tree Skirt Pattern – A magnificent festive heirloom with crimson pinstripes and scalloped border.
- Crochet Christmas Stocking Pattern – Classic textured holiday mantel stocking with faux-fur trim.
- Caron Harvest Crochet Pumpkins Pattern – Cozy autumn and winter centerpiece decor in three charming sizes.
Pin This Free Holiday Pattern for Later
Save these heirloom snowflake tutorials to your Christmas Crochet and DIY Holiday Pinterest boards for festive crafting year after year!

