

Nothing evokes the timeless romance of a traditional fireside Christmas quite like heavyweight Aran cable knitwear. This free crochet cable Christmas stocking pattern brings that rich, textured grandeur to life through sculptural post-stitch twists, dimensional diamond rope cables, and a generous ribbed foldover cuff. Measuring an impressive 18 inches from cuff to heel with a roomy 12-inch circumference, this stocking is engineered to hang gracefully under the weight of holiday treasures while remaining an enduring family keepsake for generations.
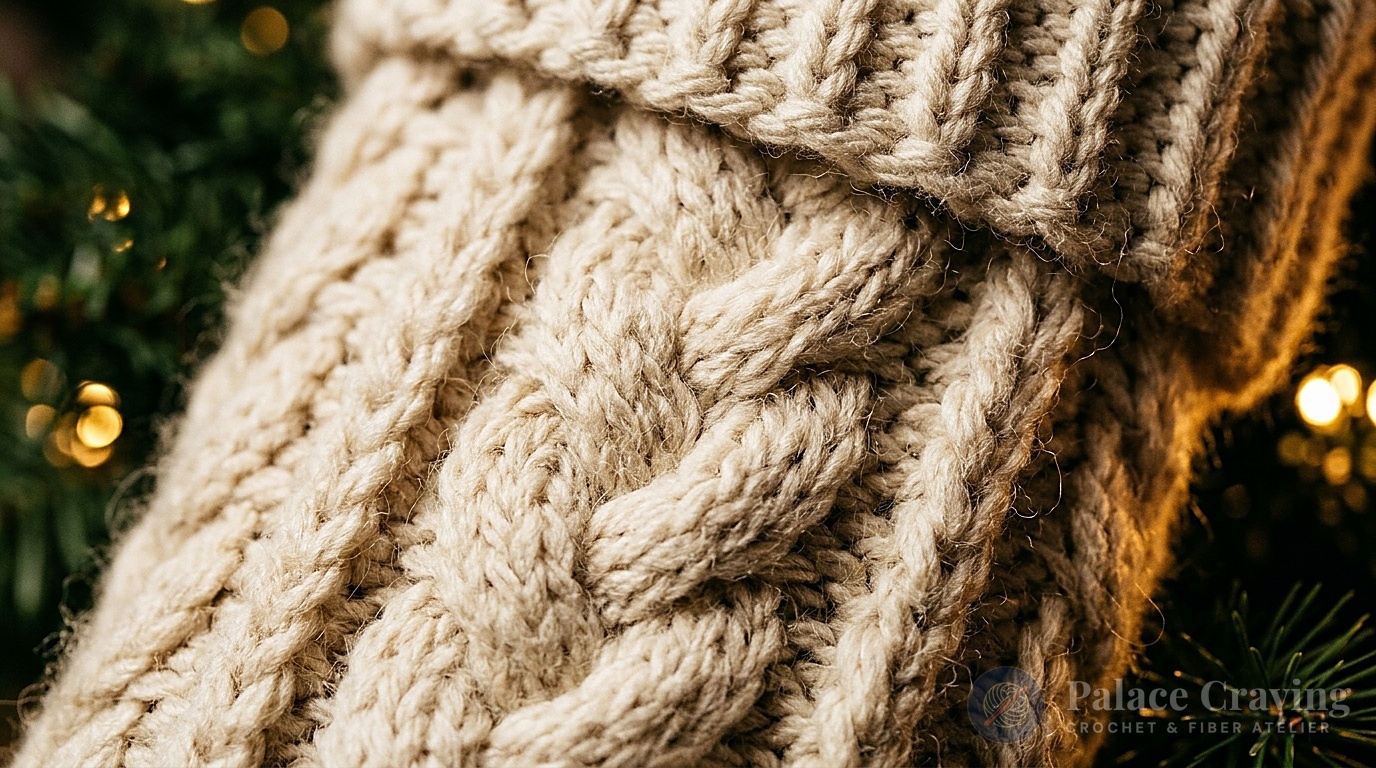
While many commercial crochet stockings rely on printed motifs or flat, uninspired stitches, this design celebrates true artisan craftsmanship. By crossing front-post double crochet (Fpdc) and back-post double crochet (Bpdc) stitches across a dense background grid, the cable ropes lift dramatically from the fabric surface, creating authentic shadow and depth. Create a breathtaking holiday fireplace display by pairing your cable stocking with our heavenly Crochet Angel Ornaments, our ringing Vintage Crochet Christmas Bells, or our tabletop 3D Crochet Christmas Tree Duo.
Why You’ll Love Making This Heirloom Cable Stocking
- Authentic Aran Cable Architecture: Features deep 3-over-3 front-post cable braids flanked by 2-over-2 twisting ropes that rival classic heritage knitwear.
- Generous 18-Inch Capacity: Sized to hold substantial holiday treats, small toys, and fruit without stretching or warping out of shape.
- Anatomically Shaped Heel & Toe: Features a reinforced short-row heel turn and seamless wedge toe that naturally points forward when hung.
- Reversible Ribbed Foldover Cuff: The cuff is worked in deep post-stitch ribbing that folds cleanly over the top edge, concealing the interior hanging loop junction.
- Durable Heirloom Construction: Crocheted in sturdy worsted weight fiber with reinforced seam joins so it holds its shape through decades of Christmas mornings.
Stocking Dimensions & Structural Blueprint
Here is how the stocking is dimensioned and proportioned:
Curated Materials & Studio Swaps

- Medium Worsted (#4) Yarn: 2 large skeins (approx. 400 yards / 365 m) of premium worsted acrylic or wool blend. Cream Aran provides classic Victorian warmth, while rich Cranberry Red or Forest Green creates bold modern farmhouse style. (Compare fibers in our Yarn Weight & Hook Size Guide).
- Size U.S. I-9 (5.5 mm) Crochet Hook: A slick inline or ergonomic 5.5mm hook glides smoothly under front-post bars without splitting plies. (Refine your grip with our masterclass on Tension Control & Hook Grips).
- Locking Stitch Markers: Essential for marking cable repeat intervals, heel flap boundaries, and round joins.
- Wooden Cable Needle or Spare Hook: Helpful for holding skipped stitches when working dramatic 3-over-3 cable crosses.
- Blunt Tapestry Yarn Needle: For grafting heel edges, cinching toe rounds, and anchoring the heavy braided hanging loop.
Mastering the Special Cable Stitches
Aran crochet cabling achieves its high-relief texture through post stitches worked in front of and behind preceding rows:
- Front Post Double Crochet (Fpdc): Yarn over, insert hook from front to back to front around the vertical post of the indicated stitch, yarn over, pull up a loop, and complete a standard double crochet.
- Back Post Double Crochet (Bpdc): Yarn over, insert hook from back to front to back around the post of the indicated stitch, yarn over, pull up a loop, and complete a double crochet.
- 3/3 Right Cross (3/3 RC): Skip the next 3 stitches. Fpdc around each of the next 3 stitches. Now, working behind the 3 Fpdc just created, work 1 Fpdc around each of the 3 skipped stitches.
- 3/3 Left Cross (3/3 LC): Skip the next 3 stitches. Fpdc around each of the next 3 stitches. Now, working in front of the 3 Fpdc just created, work 1 Fpdc around each of the 3 skipped stitches.
- 2/2 Cable Crosses (2/2 RC & LC): Worked identically to the 3/3 crosses, but crossing 2 stitches over 2 stitches for narrower accent twists.
Step-by-Step Crochet Instructions
Part 1: The Ribbed Foldover Cuff
With Cream Aran yarn, chain 52. Being careful not to twist the foundation chain, join with a slip stitch in the first chain to form a large ring.
Rnd 1 (Set-up): Ch 3 (counts as first dc here and throughout). Dc in each chain around. Join with sl st in top of beginning ch-3. (52 dc)
Rnd 2 (Ribbing): Ch 3, *[Fpdc around next st, Bpdc around next st]* repeat from * around to last st, Fpdc around last st; join with sl st to top of ch-3. (52 sts)
Rnds 3 to 8: Repeat Round 2, keeping Fpdc aligned directly over Fpdc and Bpdc over Bpdc to form vertical elastic ribbing. At end of Round 8, do not fasten off. The cuff will later fold downward over the leg shaft.
Part 2: The Cable Leg Shaft
Now we transition into the primary Aran cable repeat panel across the front and smooth stabilizing texture across the back:
Rnd 9 (Cable Setup): Ch 3, dc in next 2 sts, work [2/2 LC across next 4 sts], dc in next 2 sts, [3/3 RC across next 6 sts], dc in next 2 sts, [3/3 LC across next 6 sts], dc in next 2 sts, [2/2 RC across next 4 sts], dc in each remaining st around to complete the back leg; join with sl st to beginning ch-3. (52 sts)
Rnd 10 (Rest Round): Ch 3, work Fpdc around every cable post and regular dc in background stitches around. This stabilizes the twist height. Join.
Rnds 11 to 24: Continue the 6-round cable repeat sequence (crossing cables on every 6th round while working straight post rounds in between). Work until the leg measures approximately 11 inches from the bottom edge of the cuff.

Part 3: Turning the Anatomical Heel
The heel is worked flat back-and-forth across the 24 back stitches while leaving the 28 front cable stitches on hold:
- Heirloom Heel Flap (Rows 1–10): Work 24 sc across the back stitches. Turn. Ch 1, sc in each st across. Repeat for 10 rows to create a reinforced square heel flap.
- Heel Turn (Short Rows): Ch 1, sc in next 14 sts, sc2tog, 1 sc, turn. Ch 1, sc in next 5 sts, sc2tog, 1 sc, turn. Continue working short rows across the center stitches until all side stitches are absorbed, leaving 14 heel stitches.
- Gusset Pick-Up: Turn work, sc across 14 heel stitches, pick up and sc 10 stitches evenly along the side edge of the heel flap, work across the 28 front cable stitches in pattern, and pick up 10 stitches along the opposite heel flap edge. Join into the round.
Part 4: The Foot Bed & Toe Wedge
Continue working the 28 front stitches in cable pattern while working the bottom sole stitches in smooth double crochet for 16 rounds (approx. 7 inches from back of heel).
Toe Decreases: Place markers at both side fold edges. Work Rounds with symmetrical decreases: *(dc to 2 sts before marker, dc2tog, slip marker, dc2tog)* twice per round. Repeat for 4 rounds until 16 stitches remain. Fasten off, leaving a 12-inch tail. Weave through remaining stitches, pull tightly to cinch the toe closed, and weave in all tails inside.
Part 5: Braided Hanging Loop & Assembly
- Crochet the Loop: Cut three 24-inch strands of yarn. Braid tightly, fold into a 3-inch loop, and knot the bottom.
- Anchor the Loop: Anchor the knot firmly inside the top back seam of the stocking at the base of the cuff using your yarn needle.
- Fold the Cuff: Fold the 3½-inch ribbed cuff down over the outside of the leg shaft. The ribbed folds naturally frame the top edge while completely hiding the hanging loop anchor!
3 Pro Secrets for Flawless Holiday Stockings
1. Maintain Consistent Post Height: When working Fpdc around cable stitches, lift your crochet hook slightly upward before yarning over to pull through loops. This provides extra vertical slack so the fabric does not pucker or buckle inward around deep 3-over-3 crosses.
2. Wet Blocking Is Non-Negotiable: Aran cable crochet truly comes alive with wet blocking! Immerse your completed stocking in lukewarm water with wool wash, roll gently in a towel to remove excess moisture, and pin to shape on a foam blocking mat. As it dries, the cables puff up while background stitches relax into crisp symmetry.
3. Hidden Fabric Lining (Optional): If you plan to fill your stocking with heavy items or irregularly shaped gift boxes, sew a simple cream muslin or cotton liner inside. The liner absorbs weight tension so the crochet stitches never distort or snag on sharp corners.
Holiday Mantelpiece & Fireplace Styling Ideas

Here are inspiring ways to showcase your handmade cable stockings:
- The Modern Farmhouse Mantel: Hang a family set of cream cable stockings from matte black or antique brass stocking holders along a dark wood fireplace beam, draped in fragrant cedar garland.
- Monogrammed Leather Name Tags: Personalize each family member’s stocking with an embossed tan leather tag or laser-cut wooden name tag tied to the hanging loop.
- Staircase Garland Display: If you don’t have a traditional fireplace, tie stockings evenly along your staircase banister intertwined with eucalyptus branches and twinkle fairy lights.
- Vintage Sleigh or Blanket Ladder: Drape completed stockings across the rungs of a rustic wooden blanket ladder alongside cozy plaid throws.
Frequently Asked Questions
Can I crochet this stocking in different colors?
Yes! While natural Cream Aran evokes traditional Irish fisherman sweaters, alternating rich tones like Cranberry Red, Forest Green, or Oatmeal Heather creates stunning individual character for each family member.
Is this pattern suitable for confident beginners?
If you know how to work basic single and double crochet stitches, learning post stitches (Fpdc) is very straightforward. Start slowly with the 2/2 cable twists before advancing to the 3/3 crosses!
How many hours does it take to complete one stocking?
Most crocheters finish this project in approximately 5 to 7 hours of relaxed crafting, making it an achievable multi-evening project.
Pin This Free Holiday Pattern
Love this heirloom Aran cable project? Save this free crochet cable Christmas stocking tutorial to your Christmas Crochet, DIY Holiday Decor, and Holiday Gift boards on Pinterest!

