

There is a timeless, peaceful elegance that handcrafted angel ornaments bring to a Christmas tree. With their gentle cream gowns, delicate scalloped hem borders, clasped praying hands, and radiant golden halos, these 4½-inch crochet angel Christmas ornaments embody the true spiritual warmth of the holiday season. Designed with an ingenious continuous top-down construction that seamlessly flows from head to dress hem, this free amigurumi pattern offers both beginner ease and stunning heirloom-quality polish.
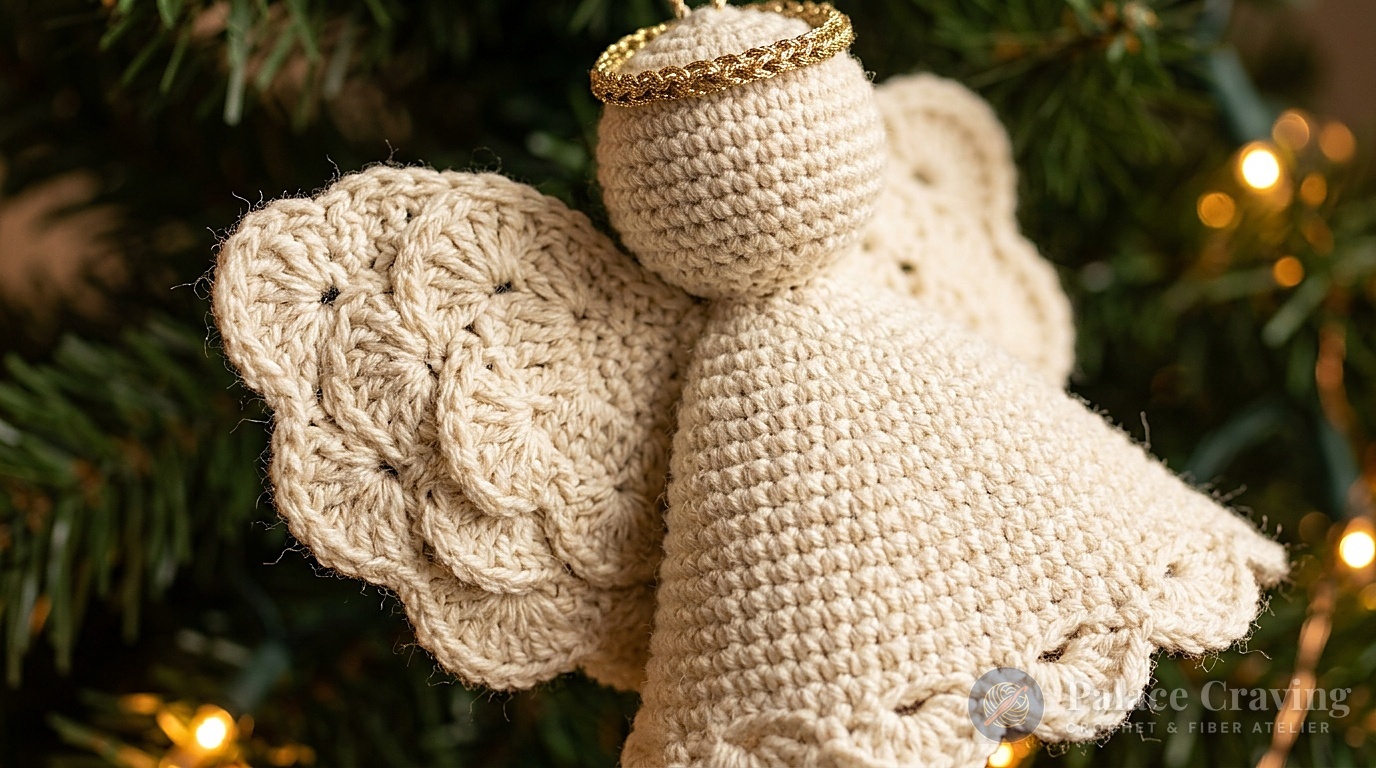
Unlike fragile glass or porcelain angels that require delicate care, these soft amigurumi angels are virtually unbreakable, making them beloved holiday treasures for family trees with children and playful pets. Because the head and body are crocheted in a single piece, you completely avoid awkward neck seaming, ensuring your angels stand perfectly poised and upright. Style them in harmony with our ringing Vintage Crochet Christmas Bells, our standing 3D Crochet Christmas Tree Duo, or our sweet Crochet Gingerbread Houses for a magical handmade holiday display.
Why You’ll Love Making These Crochet Angel Ornaments
- Continuous Head-to-Gown Construction: Eliminate tedious head seaming—the body flows directly from the stuffed amigurumi head through the neck into the expanding skirt.
- Elegant Scalloped Shell Hemline: The bottom edge finishes with decorative shell arches (
[ch 1, 3 dc, ch 1, sl st]) that give the angel dress romantic movement and vintage character. - Dimensional Layered Shell Wings: Wings are worked in double crochet fan clusters that maintain crisp feather definition without requiring wire framing or stiffening chemicals.
- Radiant Golden Halo: Crocheted in gleaming cornmeal gold yarn, the halo perches gracefully atop the head with built-in hanging loop support.
- Heartwarming Heirloom Gift: Perfect for Sunday school gifts, memorial keepsakes, tree-trimming exchanges, or package toppers that loved ones will cherish year after year.
Anatomy & Stitch Count Breakdown
Each completed angel stands approximately 4½ inches (11.5 cm) tall with a wing span of 3½ inches (9 cm). Here is the structural breakdown of the design:
Curated Materials & Studio Swaps

- Medium Worsted (#4) Yarn:
- Color A (Cream Aran / Off-White): Approx. 35 yards for head, gown, arms, and wings.
- Color B (Cornmeal / Antique Gold): Approx. 8 yards for the crown halo ring.
- Colors C & D (Pale Plum Lavender / Aruba Sea Aqua): Small scraps (approx. 5 yards each) for delicate accent striping or solid pastel gown variations.
- Size U.S. F-5 (3.75 mm) or G-6 (4.0 mm) Crochet Hook: A slightly snug 3.75mm hook creates tight, dense stitches that prevent white polyester fiberfill from showing through the amigurumi fabric. (Master tension control with our guide on Hook Grips & Tension Control).
- Polyester Fiberfill Stuffing: Small puff for the head and chest.
- Locking Stitch Marker: Essential for marking spiral rounds without joining seams.
- Blunt Tapestry Yarn Needle & Scissors: For assembly, wing placement, and weaving ends.
- Optional Finishing Notions: Red crayon or blush powder with a cotton swab for rosy cheeks, and 2-ply embroidery floss for closed eyelash details.
Gauge & Essential Working Notes
Gauge: 20 single crochet (sc) and 20 rounds = 4 inches (10 cm).
Continuous Spiral Technique: The head and body are worked in continuous rounds without slip stitch joins or chain-1 turnings. Always move your locking marker to the final stitch of each round to ensure accurate shaping.
Step-by-Step Crochet Instructions
Phase 1: Head & Continuous Body Gown
With Color A (Cream Aran), make an adjustable magic loop.
Rnd 1 (RS): Ch 1. Work 6 sc in loop. Place marker (PM) in last st. Pull loop tight. (6 sc)
Rnd 2: Work 2 sc in each sc around. (12 sc)
Rnd 3: *(2 sc in next sc, 1 sc in next sc)* 6 times around. (18 sc)
Rnd 4: *(2 sc in next sc, 1 sc in each of next 2 sc)* 6 times around. (24 sc)
Rnds 5 to 8: Work 1 sc in each sc around. (24 sc per round)
Rnd 9 (Head Taper): *(Sc2tog, 1 sc in each of next 2 sc)* 6 times around. (18 sts)
Rnd 10 (Neck Cinch): *(Sc2tog, 1 sc in next sc)* 6 times around. (12 sts)
Stuffing Pause: Firmly pack polyester fiberfill into the head cavity until smoothly rounded.
Rnd 11 (Neck Collar): Work 1 sc in each sc around. (12 sc)
Rnd 12 (Shoulder Expansion): *(2 sc in next sc, 1 sc in next sc)* 6 times around. (18 sc)
Rnd 13: Work 1 sc in each sc around. (18 sc)
Rnd 14: *(2 sc in next sc, 1 sc in each of next 2 sc)* 6 times around. (24 sc)
Optional Color Change: If you wish to make a pastel gown, switch to Color C (Plum) or Color D (Aqua) at the end of Round 14.
Rnds 15 to 20: Work 1 sc in each sc around. (24 sc per round)
Rnd 21 (Lower Skirt Flare): *(2 sc in next sc, 1 sc in each of next 3 sc)* 6 times around. (30 sc)
Rnd 22: Work 1 sc in each sc around. (30 sc)
Rnd 23 (Scalloped Gown Hem): Sc in next 3 sc, slip st in next sc, *[ch 1, 3 dc in next sc, ch 1, slip st in next sc]* 5 times across front, sc in next 4 sc; join with a slip stitch in first sc. Fasten off, leaving a long tail to neatly secure inside the skirt. (5 scalloped shell arches)

Phase 2: Dimensional Shell Wings (Make 2)
With Color A (Cream), ch 6.
Rnd 1: Sc in 2nd ch from hook, sc in next 3 ch, 3 sc in last ch; working along opposite side of foundation chain, sc in next 4 ch. Turn. (11 sc)
Rnd 2: Ch 1, 2 sc in first st, sc in next 4 sts, 3 sc in center end st, sc in next 4 sts, 2 sc in last st. Turn. (15 sc)
Rnd 3 (Feather Shell Edge): *[Ch 2, 2 dc in next st, ch 1, slip st in next st]* 4 times along the curved wing edge, sl st along flat straight inner edge. Fasten off, leaving a 12-inch tail for seaming.
Phase 3: Praying Arms (Make 2)
With Color A, ch 2.
Rnd 1: Work 4 sc in 2nd ch from hook. (4 sc)
Rnds 2 to 6: Work 1 sc in each sc around. Fasten off at end of Round 6, leaving a sewing tail. (Do not stuff arms—keeping them flat makes them easier to fold into prayer pose).
Phase 4: Golden Halo Ring
With Color B (Gold), ch 4.
Rnd 1: Work 11 dc in the 4th ch from hook (the 3 skipped chains count as the first dc); join with a slip stitch into the top of the beginning chain-3. (12 dc in a circle). Fasten off, leaving a sewing tail.
Phase 5: Angel Assembly & Finishing Touches
- Attach Arms: Position the two arms on either side of Round 12 (shoulders). Angle the hands inward toward the center chest and tack the fingertips together with a stitch of cream yarn so they rest in prayer.
- Sew Wings: Place the two shell wings side-by-side on the back of the angel at shoulder height. Whipstitch the flat inner edges securely to the gown back with your yarn needle.
- Crown with Halo: Position the golden halo circle horizontally atop the crown of the head, tilting it slightly back. Stitch securely in place through the top head stitches.
- Add Hanging Loop: Thread a 6-inch strand of gold yarn through the back center of the halo and knot to create a clean hanging loop.
- Blushing Cheeks (Optional): Gently dip a cotton swab into a red crayon or soft makeup blush, then dab lightly onto either side of the face below Round 7 for sweet angelic rosy cheeks!
3 Pro Secrets for Heirloom Quality Angels
1. Maintain Firm Head Stuffing: Because the body is hollow below the chest to maintain its flared bell silhouette, pack the head and neck collar extra firmly. This prevents the head from wobbling or tilting forward under the weight of the halo.
2. Blocking Shell Wings: Before sewing the wings to the body, pin them out on a blocking board and lightly steam or mist them with water. This opens up the double crochet shell fans so they look crisp, sharp, and symmetrically spread.
3. Stiffening the Skirt Hem: If you plan to display your angels freestanding on tabletops or fireplace mantels, mist the inside of the skirt scallops with a light diluted craft glue spray. Once dry, the gown will hold a rigid cone shape that stands without tipping!
Holiday Mantelpiece & Tree Styling Ideas

Here are beautiful ways to incorporate your crochet angels into your Christmas traditions:
- Top-Branch Christmas Tree Perch: Hang your angels among the upper boughs of the Christmas tree near the tree topper star where twinkle lights illuminate their golden halos.
- Holiday Nativity Centerpiece: Place two standing angels flanking your Christmas crèche or nativity scene on the dining buffet table.
- Heirloom Holiday Memorial Gifts: Craft an angel in memory of loved ones, embroidering an initial or year onto the back of the wing with gold thread.
- Hostess & Package Gift Accent: Tie an angel around a bottle of sparkling cider or holiday wine tied with velvet ribbon as an unforgettable gift keepsake.
Frequently Asked Questions
Can I make these angels in different colors?
Yes! While traditional white and cream evoke classic celestial serenity, soft blush pink, baby blue, or metallic silver accents make gorgeous modern interpretations.
Can these angels stand on their own without hanging?
Yes! The flat scalloped hemline provides a stable circular base that allows the angel to stand freestanding on flat shelves, mantels, or windowsills.
How long does it take to make one angel?
An experienced crocheter can complete one angel from head to halo in about 45 to 60 minutes, making it an ideal weekend project for crafting a multi-angel set.
Pin This Free Holiday Pattern
Love this heavenly holiday project? Save this free crochet angel Christmas ornament guide to your Christmas Crochet, DIY Holiday Ornaments, and Heirloom Crafts boards on Pinterest!

